Application Development with QML is simple and powerful. But Qt C++ can be more performant, offers many features and is less error-prone. This post shows you how to create apps that take advantage of both languages.
- How to Communicate between C++ and QML
- How to Access a C++ Object from QML
- How to Register your C++ Class as a QML Type
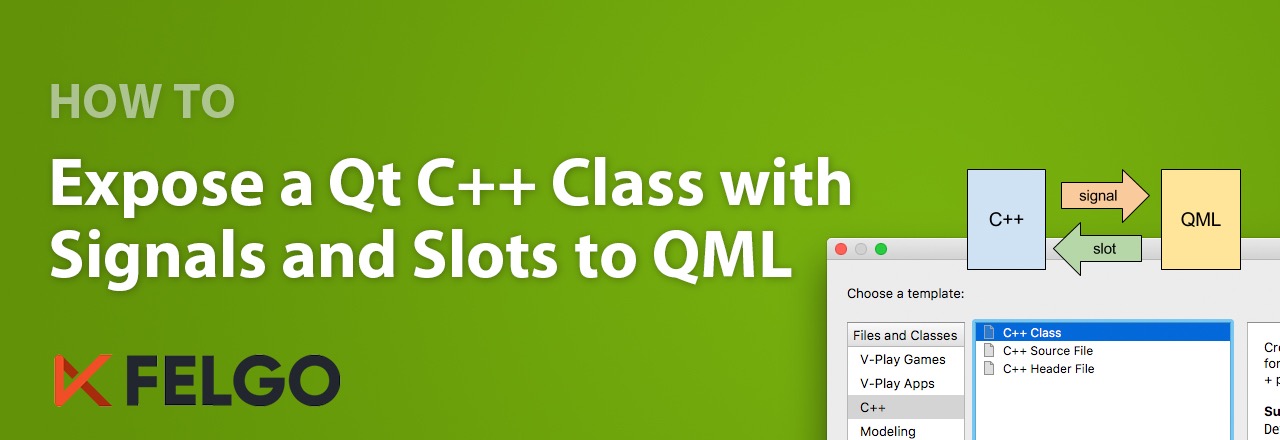
How to Communicate between C++ and QML
It is important to choose the right language for different features of your app. Integrate C++ components with QML to take your mobile app development to the next level.
Advantages of Coding in QML
Felgo Engine for Qt-based mobile apps and games uses the power of Qt Quick (QML + Javascript). This declarative scripting language is so powerful that it saves up to 60% lines of code compared to other programming languages.
Coding in QML has several advantages over development with C++:
- Coding with QML + JavaScript is very easy to learn and allows you to reduce the required amount of code a lot.
- Language concepts like states, signals or property bindings are a huge time-saver.
- QML makes adding animations simple. You can animate every property of your QML types with simple Animation components.
- QML is extensible and flexible. For example, you can extend objects with new properties and features in-line. No need to create a new re-usable type for small extensions.
- The QML Rendering Engine offers great performance. The renderer uses C++ Qt and relies on a hardware-accelerated scene graph. This makes it fast enough to power even high-performance games.
When to use C++ Instead
Qt app development with C++ has advantages as well. For some scenarios, you need features that are only available with Qt C++. Also, C++ is fast and type-safe. This allows you to provide the best possible performance for long-running and data-intense calculations.
For these examples, you would choose C++ over QML:
- Native C++ code is the right choice for data-intense operations. It will outperform interpreted QML/JavaScript code.
- C++ code is type-safe and compiled into object code. For parts where stability and security are important, using C++ helps to make your app less error-prone.
- The Qt C++ components offer different and in some cases more features than the QML types. For example, advanced networking features.
- It is also possible to mix C++ with native code for Android (over JNI) or iOS (Obj-C or Swift). This allows to provide such native functionality for QML as well.
Felgo Engine extends Qt for mobile app and game development. It already covers tasks like accessing native device features – so you don’t have to worry about going deep into C++ or Java and Obj-C.
Still, to get the most out of your application you can use the advantages of both languages. The full example of this guide is also available on GitHub:
How to Access a C++ Object from QML
Before we go into any details, let us start by creating a simple Felgo Apps project with Qt Creator. If you are new to Felgo and don’t know how, please consider having a look at the Getting Started Tutorial or the Felgo Designer Tutorial Video.
To sign-up and install Felgo, see the download page of the Felgo website.
Note: Adding custom C++ code is not supported when testing with QML Live. Please build your project with the classic RUN button to test the examples below.
Create a C++ Class in your Felgo Project
1. After creating a new app project, first replace the code in Main.qml with this basic structure:
import Felgo 3.0
import QtQuick 2.5

App {

 NavigationStack {
   Page {
     title: "Integrate C++ and QML"
   }
 }
}
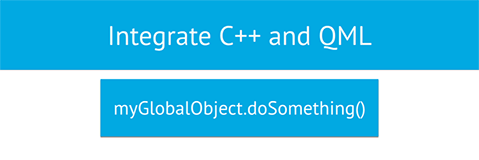
It only includes the main App window and a Page within NavigationStack to show a navigation bar that holds the page title:

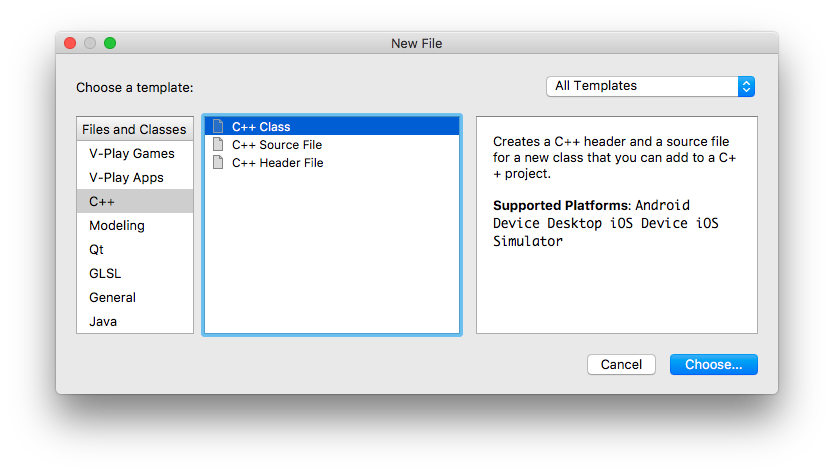
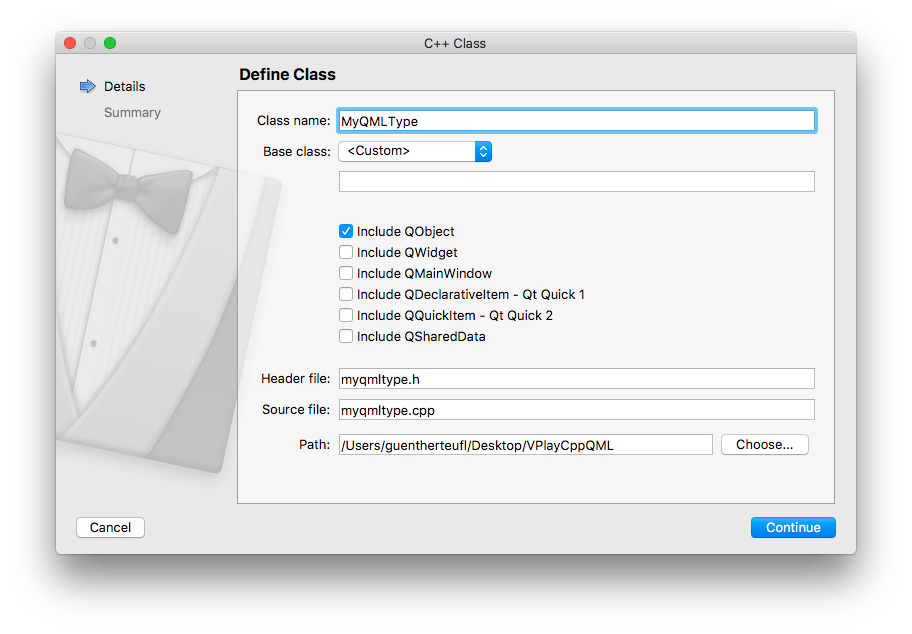
2. This is enough for our basic QML setup. Let’s go on by creating a new C++ class. First, right-click the C++ “Sources” folder of your project in Qt Creator, select “Add New…” and choose the “C++ Class” template in the C++ section:
3. Then set “MyGlobalObject” as Class Name and select “Include QObject” to include the QObject type, as the main requirement to prepare our class for usage with QML is to derive from QObject.

After completing the wizard, your project contains the class definition myglobalobject.h in the “Headers” folder and the implementation myglobalobject.cpp in the “Sources” folder of the project.
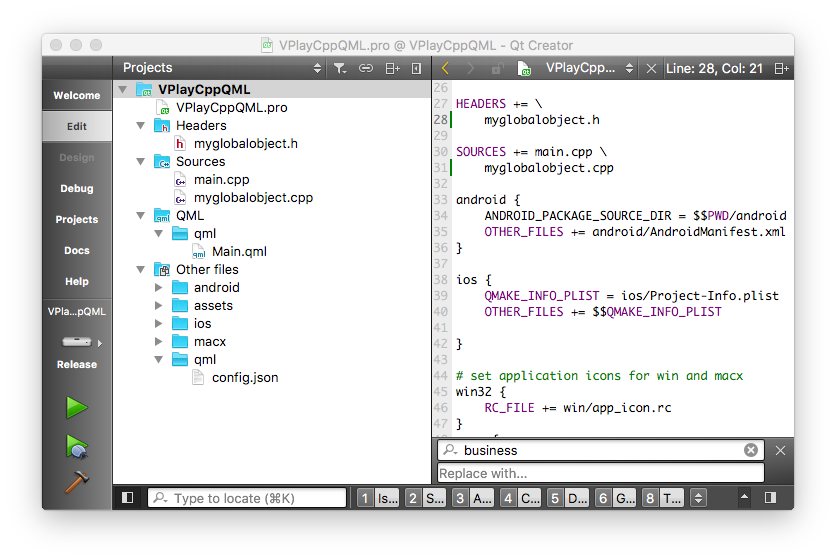
Note that the *.pro configuration now also includes the new files in the HEADERS and SOURCES configuration.
Implement the C++ Class with Signals and Slots for Usage with QML
1. Open myglobalobject.h and add some code to derive from QObject – the required include statement is already in place:
#ifndef MYGLOBALOBJECT_H
#define MYGLOBALOBJECT_H

#include <QObject>

class MyGlobalObject : public QObject
{
 Q_OBJECT

public:
 MyGlobalObject();
};

#endif // MYGLOBALOBJECT_H
Do not forget to also add the Q_OBJECT preprocessor macro within the class definition.
2. Now that we have a new QObject, let’s add a simple method we will later call from QML. To make the method available in QML, it is required to mark it as a public slot:
class MyGlobalObject : public QObject
{
 Q_OBJECT

public:
 MyGlobalObject();

public slots: // slots are public methods available in QML
 void doSomething(const QString &text);
};
3. To complete our basic class, open myglobalobject.cpp and add the method implementation for doSomething(). We keep it simple and only print the given text to the debug output.
#include "myglobalobject.h"
#include <QDebug>

MyGlobalObject::MyGlobalObject()
{
 // perform custom initialization steps here
}

void MyGlobalObject::doSomething(const QString &text) {
 qDebug() << "MyGlobalObject doSomething called with" << text;
}
Expose an Object to QML as a Context Property
One possible way to work with a C++ object in QML is to add the object as a property to the root context of the QML tree. You can decide on a name for the property, which is then globally available in your QML code.
1. To create a new object of our class and add it as a property, we extend the main.cpp code:
// keep existing includes here
// include qml context, required to add a context property
#include <QQmlContext>

// include custom class
#include "myglobalobject.h"

int main(int argc, char *argv[])
{
 // Felgo initialization ...

 // add global c++ object to the QML context as a property
 MyGlobalObject* myGlobal = new MyGlobalObject();
 myGlobal->doSomething("TEXT FROM C++");
 engine.rootContext()->setContextProperty("myGlobalObject", myGlobal); // the object will be available in QML with name "myGlobalObject"

 engine.load(QUrl(vplay.mainQmlFileName()));
 return app.exec();
}
Note: It is possible to fully use the object also in C++. The above code example already includes a test-call to our doSomething method.
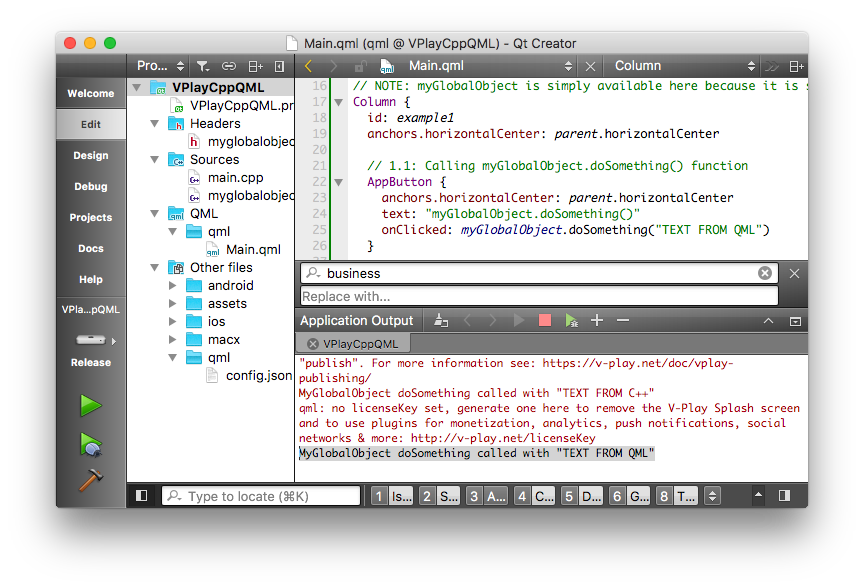
2. In the Main.qml of our project, we extend our Page with a Column and a first AppButton, which calls the doSomething() method when clicked:
   Page {
     title: "Integrate C++ and QML"

     // Example 1 - Global Context Property
     // NOTE: myGlobalObject is available here because it is set as a context property in main.cpp
     Column {

       // 1.1: Calling myGlobalObject.doSomething() function
       AppButton {
         text: "myGlobalObject.doSomething()"
         onClicked: myGlobalObject.doSomething("TEXT FROM QML")
       }

     }
   }
3. Let’s hit the green run button in Qt Creator to see how it works. The debug output shows the initial method call from main.cpp and with a click on the button another message appears:
MyGlobalObject doSomething called with “TEXT FROM QML”
That’s all we need to call methods of a C++ Object from QML. This already allows simple communication from QML to C++, but there’s even more we can do. QML supports many amazing concepts like value-changed listeners of properties and property bindings, which make development a lot easier. So let’s add a full-featured QML property to our C++ class!
Add a Class Property with Full QML Support
1. Open mylgobalobject.h and add a private counter property with a public getter and setter method.
class MyGlobalObject : public QObject
{
// …


public:
 int counter() const;
 void setCounter(int value);

private:
 int m_counter;
};
2. Implement the required methods and initialize the counter property in myglobalobject.cpp
MyGlobalObject::MyGlobalObject() : m_counter(0)
{
 // perform custom initialization steps here
}

int MyGlobalObject::counter() const {
 return m_counter;
}

void MyGlobalObject::setCounter(int value) {
 if(m_counter != value) {
   m_counter = value;
 }
}
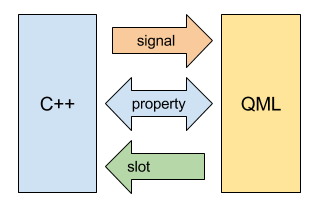
3. Similar to other properties in QML, we also want to be able to dynamically react to property changes in our QML code. In other words, we want to trigger functions in QML when the C++ property changes. Unlike the slots, which make C++ methods callable in QML, signals can be used to trigger QML code from C++. So the data flow looks like this:
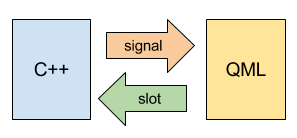
Let’s add a signal counterChanged and trigger it in our setCounter implementation:
myglobalobject.h:
class MyGlobalObject : public QObject
{
//  ...

signals:
 void counterChanged();
};
myglobalobject.cpp:
void MyGlobalObject::setCounter(int value) {
 if(m_counter != value) {
   m_counter = value;
   counterChanged(); // trigger signal of counter change
 }
}
4. This simple change already allows us to add handler functions for the counterChanged() signal in QML. However, our counter property is still a normal C++ property with a getter and setter method. We can take care of that with an additional preprocessor macro:
class MyGlobalObject : public QObject
{
 Q_OBJECT
 Q_PROPERTY(int counter READ counter WRITE setCounter NOTIFY counterChanged) // this makes counter available as a QML property

// ...
};
The Q_PROPERTY macro defines a property counter and configures the methods for reading and writing the property, as well as the signal that notifies property changes. This configuration is used by QML to work with the property.
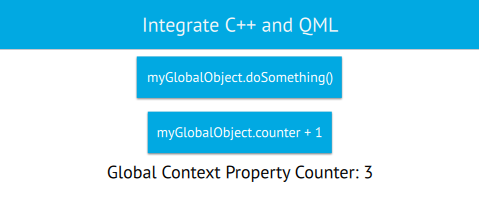
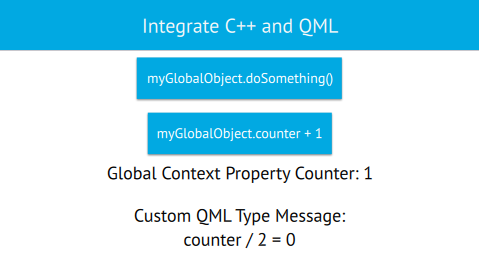
5. Let’s extend our Main.qml and use our new counter property. The following snippet adds a new button to increase the counter and a text item to display the value:
     Column {

       // ...

       // 1.2: Increasing myGlobalObject.counter property
       // NOTE: the defined setter function of the property is used automatically and triggers the counterChanged signal
       AppButton {
         text: "myGlobalObject.counter + 1"
         onClicked: {
           myGlobalObject.counter = myGlobalObject.counter + 1
         }
       }

       // 1.3: Showing myGlobalObject counter value in a QML text
       // NOTE: property bindings are supported, as the counter property definition includes the counterChanged signal, which is fired in the implementation of MyGlobalObject::setCounter() for each property change
       AppText {
         text: "Global Context Property Counter: " + myGlobalObject.counter
       }
     } // Example 1
Our property is usable like any other property in QML. Thanks to the counterChanged we prepared, the text even updates automatically every time we change the counter.
This is how the final example looks like:
How to Register your C++ Class as a QML Type
The second possibility to use C++ components in QML is to register the class as a QML type. This allows to create objects (= instances) of your type directly in QML instead of C++. And the best thing is, the concepts with signals, slots and properties we used in the previous example still apply.
When to Use a Context Property and when a QML Object
If there’s only a single object instance you want to work with in QML you can add the object as a context property. When there can be multiple instances of your class, register it as a QML type and create the objects directly in QML where you need it.
1. For this example, we will create a new type we can use in QML. Let’s start with adding a new C++ Class named MyQMLType
2. Replace the code in myqmltype.h with this implementation:
#ifndef MYQMLTYPE_H
#define MYQMLTYPE_H

#include <QObject>

class MyQMLType : public QObject
{
 Q_OBJECT
 Q_PROPERTY(QString message READ message WRITE setMessage NOTIFY messageChanged) // this makes message available as a QML property

public:
 MyQMLType();

public slots: // slots are public methods available in QML
 int increment(int value);

signals:
 void messageChanged();

public:
 QString message() const;
 void setMessage(const QString& value);

private:
 QString m_message;

};

#endif // MYQMLTYPE_H
Similar to the previous example, this type will have one public slot and a full-featured property with a getter method, a setter method and a property changed signal. The increment method increases a given integer value by one and the message property will store a string value.
3. To complete the class, add the following code for myqmltype.cpp:
#include "myqmltype.h"

MyQMLType::MyQMLType() : m_message("")
{

}

int MyQMLType::increment(int value) {
 return value + 1;
}

QString MyQMLType::message() const {
 return m_message;
}

void MyQMLType::setMessage(const QString& value) {
 if(m_message != value) {
   m_message = value;
   messageChanged(); // trigger signal of property change
 }
}
Which Parameters Can you Pass between C++ and QML
In contrast to the previous example, our new class also uses a return value for the increment slot. No further adjustments are required to receive the return value in QML. Qt automatically maps basic C++ types to QML types for all method parameters and return values.
For more information about available Qt types and corresponding QML types, please see Data Type Conversion Between QML and C++.
Register and Use your C++ QML Type
1. In your main.cpp, first add an include statement for the new class:
#include "myqmltype.h"
2. Then use qmlRegisterType to add the class as a QML Type.
int main(int argc, char *argv[])
{
 // ...

 // register a QML type made with C++
 qmlRegisterType<MyQMLType>("com.yourcompany.xyz", 1, 0, "MyQMLType"); // MyQMLType will be usable with: import com.yourcompany.xyz 1.0

 engine.load(QUrl(vplay.mainQmlFileName()));
 return app.exec();
}
The method takes several parameters: The module identifier and version define the required QML import to use the type. The last parameter holds the name of the QML type, which can be different from the actual C++ class name.
3. Add the import which matches the used configuration of qmlRegisterType to your Main.qml:
// NOTE: the import identifier, version and QML type name are set in main.cpp at qmlRegisterType(...)
import com.yourcompany.xyz 1.0
4. For an example usage of our new QML Type, add the following snippet below the first example:
   Page {
     title: "Integrate C++ and QML"

     Column {
       // ...

     // Example 2: Custom QML Type implemented with C++
     // NOTE: This type is declared in main.cpp and available after using "import com.yourcompany.xyz 1.0"
     MyQMLType {
       id: typeFromCpp

       // 2.1: Property Binding for MyQMLType::message property
       // NOTE: Similar to types created purely with QML, you may use property bindings to keep your property values updated
       message: "counter / 2 = " + Math.floor(myGlobalObject.counter / 2)

       // 2.2: Reacting to property changes
       // NOTE: With the onMessageChanged signal, you can add code to handle property changes
       onMessageChanged: console.log("typeFromCpp message changed to '" + typeFromCpp.message+"'")

       // 2.3: Run code at creation of the QML component
       // NOTE: The Component.onCompleted signal is available for every QML item, even for items defined with C++.
       // The signal is fired when the QML Engine creates the item at runtime.
       Component.onCompleted: myGlobalObject.counter = typeFromCpp.increment(myGlobalObject.counter)
     }

     // 2.1: Show typeFromCpp.message value, which is calculated automatically based on the myGlobalObject.counter value
     AppText {
       text: "Custom QML Type Message:\n" + typeFromCpp.message
     }
   }
The code shows that we can now use MyQMLType like any other QML item. The message property is initialized inline with a property binding, that shows the integer result of dividing myGlobalObject.counter by two. Whenever the counter changes, this expression is re-evaluated automatically.
In addition, when in turn the message changes (every 2 counter steps), we use the onMessageChanged signal to display the new message in the log output.
Similar to other QML Items, the Component.onCompleted signal is available to perform initialization steps when the QML engine creates the object. In this example, we use the increment slot to increase the counter by 1.
The AppText at the bottom simply displays the message property:
Use a Property, Signal or Slot?
As we’ve already seen in the previous examples, properties, signals and slots offer different types of communication between C++ and QML:
- Slots allow communication from QML to C++: Slots are used to trigger C++ code from QML. You can use parameters and return values to pass data to and from C++.
- Signals allow communication from C++ to QML: Signals are used to run QML code when certain events occur C++. You can pass parameters from C++ to QML. However, you can not return data from QML.
In contrast to slots, signals may be handled by none, one or many components. There is no guarantee that triggering a signal in C++ will actually run QML code, unless there’s a handler defined.
Properties work both ways: Properties are read- and write-able from both C++ and QML. To support property bindings in QML, make sure to add a changed-signal for the property and do not forget to trigger the signal in C++ whenever the value changes.
How to Start Long-running C++ Operations from QML
The above example already fully covers slots and properties, but only uses a signal as part of the property configuration. To complete the example, let’s add a new slot startCppTask(), a new method doCppTask() and a new signal cppTaskFinished() to myqmltype.h:
public slots:
 int increment(int value);
 void startCppTask(); // starts internal calculations of doCppTask()

signals:
 void messageChanged();
 void cppTaskFinished(); // triggered after calculations in doCppTask()

public:
 QString message() const;
 void setMessage(const QString& value);

private:
 void doCppTask(); // method for internal calculations
 QString m_message;
We will later call the slot startCppTask() from QML, which executes the internal doCppTask() method. You can e.g. run calculations in another thread at this point to avoid blocking the QML UI while performing the task. This is useful for any cpu-intense or long-lasting operation you want to handle in C++. By adding the implementation for the methods to myqmltype.cpp, we are fnished with the C++ part.
void MyQMLType::startCppTask() {
 this->doCppTask();
}

void MyQMLType::doCppTask() {
 // NOTE: you can do calculations here in another thread, this may be used to perform
 // cpu-intense operations for e.g. AI (artificial itelligence), Machine Learning or similar purposes
 // When the work is done, we can trigger the cppTaskFinished signal and react anyhwhere in C++ or QML
 cppTaskFinished();
}
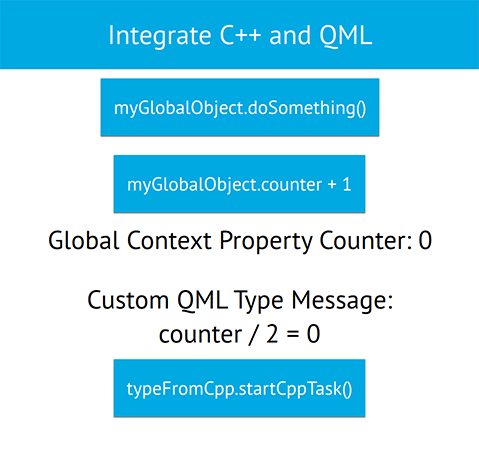
As everything is prepared now, we can add another AppButton that starts our C++ task:
// 2.4: Button to start cpp task
AppButton {
  text: "typeFromCpp.startCppTask()"
  onClicked: {
      typeFromCpp.startCppTask()
  }
}
The onCppTaskFinished() signal will notify us when the C++ part has finished calculations:
MyQMLType {
  // ...

  // 2.4: Handling a custom signal
  onCppTaskFinished: {
    myGlobalObject.counter = 0 // reset counter to zero, this will also update the message
  }
}
In this example, we simply reset our global counter to zero when the signal fires, which will also update the message property of MyQMLType.
This is how the final example looks like after executing the cpp task:
Note: To handle custom signals in QML when using a context property, use the Connections QML Type. The following snippet adds a handler to the counterChanged() signal of myGlobalObject:
// 2.5: Connections allow to add signal handlers for global context property objects
Connections {
    target: myGlobalObject
    onCounterChanged: console.log("Counter changed to " + myGlobalObject.counter)
}
When to Derive from QQuickItem instead of QObject
In all used examples, we created a C++ Class which extends QObject. However, there are some limitations to QObjects: QObjects do not have a visual representation. This means they can not hold any child items and properties regarding visual features like size, position, visibility are not available.
A QObject only holds data and logic you can use in QML as properties, signals and slots. When registering a QObject class as a type for QML, keep this restriction in mind. To create a QML Item with C++ which should support a visual representation with all default properties, derive from QQuickItem instead.
As this short introduction does not cover implementing QQuickItems, please see the the Qt documentation for more information. The overview page about Integrating QML and C++ is found here.
The full source code of the project created in this guide can be found on GitHub:
More Posts Like This
Add Chat Service and Cross-Platform Leaderboard with User Profiles to Your iOS or Android App
Release 2.14.1: Update to Qt 5.9.3 | Use Live Code Reloading on macOS and Linux
How to Make Cross-Platform Mobile Apps with Qt – Felgo Apps