Introduction
Animations are an essential part of every game, especially of 2D games. Without animations, the games only display static images and look very boring.
Many 2D games use frame-by-frame animations, where each frame of the animations is a separate image. Frame-based animations are supported by Felgo with components like TexturePackerAnimatedSprite or AnimatedSprite. You can also find a tutorial about sprite sheets in the TexturePacker tutorial.
But there is another approach to animations - skeleton, alias bone-based animations. These let you define your entities as skeletons, consisting of individual bones that are attached to one another. The awesome part -
animate one bone, and every bone attached to it will animate too!
Skeleton animations are provided by the Spine framework by Esoteric Software and are now supported by Felgo.
If you are not yet familiar with the basic setup of Felgo projects, QML or how to create your own entities, please consider taking a look at the following tutorial to help you get started:
About Spine
Spine is a standalone animation tool available for multiple PC platforms created by Esoteric Software. It is the leading bone-based animation editor for games with many useful features. For a summary of them, see here.
The cool thing is, Spine is supported by Felgo. This means, you can use your Spine animations in your Felgo games. This tutorial will guide you through all the steps to include Spine animations in your Felgo project.
So how does Spine work? In Spine, you create skeletons that consist of bones. These bones are attached to one another. You then add individual graphics to these bones to create complete game entities.
But the most important part of Spine are animations. It is possible to define animations, in which you have full control over every part of the skeleton. You can choose which parts of the skeleton should animate from where,
to where and in which time. This way, it is easy to create many different animations for a single entity.
Important Spine Features
As already mentioned, Spine lets you define your entities as skeletons and then create animations for these skeletons. It also includes some amazing features which make defining these animations even better:
Skins
Once a skeleton is defined, it can be used for multiple skins. One skin defines one "look" of your entity. You can, for example, reuse one skeleton for lots of visually different characters. All animations you define will
automatically work for every skin of your entity!
This allows to choose or switch the skin of an entity at runtime inside a Felgo game. For example to choose between a male or female goblin:
Using free-form deformations, you can overlay parts of your entities with polygons, and then animate the vertices of these polygons. This will automatically deform the images in the same way.
Using FFD, you can easily create all kinds of movement in your entities, from facial expressions to hair moving in the wind and whatever else you can imagine.
Note: FFD can have a negative impact on performance, if the Spine object is instantiated many times. Also, FFD is not yet fully supported by Felgo as some mobile devices still have troubles rendering FFD entities.
See how to change a goblin's face in seconds by using free-form deformation:
Inverse Kinematics (IK)
Ever heard of kinematics? It's a science concerned with moving connected body parts. For example, it can describe where your hands will move to if you use your shoulder and arm muscles in a specific way.
So what does this have to do with creating animations? Well, everything! When you inverse kinematics, you can tell your brain to move your hand somewhere, and your muscles will do the rest for you.
The same thing can be done with Spine animations. Once you created a more or less complex skeleton, you can add kinematic constraints to them. After that, it is possible to animate the outermost part of the skeleton, and the
other bones and joints will automatically follow. This way, you don't have to worry about animating every single joint just to have the outer part reach some destination.
Note: The current Felgo spine implementation does not yet support inverse kinematics. We will add this feature soon.
The following image moves a foot with IK - the legs and knee automatically follow:
And more...
This was only a short introduction to the most interesting features of Spine - to check out the rest, visit their official website.
Using Spine Animations with Felgo
This tutorial does not cover how to create your own animations in Spine - but I'm sure you can find a lot of tutorials on this out there.
Once you have finished your entity and animations in Spine, it is time to export them to a format Felgo can use. That's where this tutorial comes into play.
Export From Spine
First, the spine object's metadata has to be exported from Spine. This is done by opening the Spine menu and clicking "export". Next, choose JSON as the output format and define a location to save the file to. This step
requires a valid Spine license.
Convert to QML
Felgo uses a tool to convert the JSON format exported from Spine to a native QML file. It creates a pretty long, but otherwise completely normal QML file you can use in your Felgo game.
Download Spine QML Converter:
To convert the JSON file to QML, open a command window in the folder where you exported it to and type
> qml-spine <filename>.json [packed]
into the command line. The optional parameter packed specifies whether to use spritesheets or not - more on that later.
Note: Please make sure that you run the tool from the directory where the JSON file is located to avoid problems with relative image paths for the entity.
This will generate a QML file called <Filename>.qml you can then use add to your project.
Note: To get the "open command window here" option in Windows Explorer, press shift while right clicking on blank space.
Adding the Spine Object and Images to Your Game
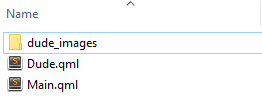
We can now add the generated QML file to our game like every other. Just paste it into your project folder.
As Spine objects use images to display the entity, we need to add them as well. The generated file expects to find the source images (or spritesheet, see below) inside a folder called <filename>_images.
For example, if your export is called dude.json, the images should be placed in a folder called dude_images. Add this folder to the same directory where you pasted the generated QML file.
This is an example how it can look like:
You can then add your animation to your game:
 GameWindow {
   Scene {
     id: scene
     Dude {
       id: dude
       x: scene.width / 2
       y: scene.height / 2
     }
   }
 }
Internally, the generated QML file uses SpineSkeleton as the base type. This type provides a few utility methods for controlling the animations. In case you want to move the images to
another folder, e.g. the assets folder of your project, change the SpineSkeleton::imageFolder property to your desired location.
Note: The origin of the coordinate system in Spine will also be the center of the generated QML object.
Creating a Spritesheet - Optional
While developing and creating your animations, it is pretty comfortable to just paste all source images used for the animation in the image folder.
Alternatively, it is also possible load all images for your entity from a single spritesheet. Creating spritesheets for use with Felgo is easy - check out our guide on
TexturePacker.
Note: Spritesheets are a good way to decrease memory usage and improve performance. However, the current integration of spine with Felgo does not yet support spritesheets in the most performant way. Until we improve
the performance of spritesheets with spine, better results might be achieved with individual instead of packed images.
In order to use spritesheets with your spine entity, simply add the packed parameter when converting the Spine export to QML.
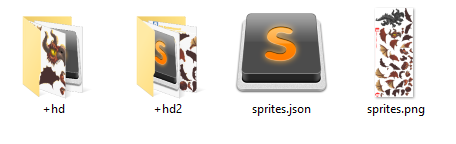
The generated file will then try to load all images from a spritesheet called sprites.json. Just place your spritesheet to the images folder instead of the single single images. Of course, multi-resolution
support with the "hd" and "hd2" variants is also possible, see the TexturePacker guide for details.
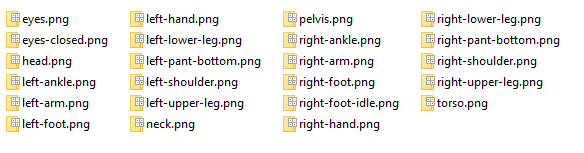
Here's how an image folder looks like, if no spritesheets are used, and packed was not specified:
When using spritesheets, your image folder should look something like this:
Changing the Image Folder
SpineSkeleton has a property called imageFolder, which determines where the images are loaded from. By default, it uses
<filename>_images, but you can set it to whatever you like.
This can be helpful if, for example, multiple different spine objects should share one spritesheet. In this case, just set this property to the same folder for two different Spine objects. You may also move the images to
your projects assets folder by setting the correct relative image path.
Controlling the Animations
So now you have added your Spine object to your game. Time to make it move!
Animations defined in the Spine editor are identified by their name. They can be referred to by the same name in Felgo. For example, if an animation is called "jump" in spine, your generated QML object will provide a
property called "jumpAnimation".
And the best part: These animations are simple Qt ParallelAnimation objects. This means, that all the existing properties, methods and signals can be
used for the spine animations as well.
The only difference is, an animation should be started by calling the SpineSkeleton::animate() method instead of Animation::start().
Here's how to make your dude jump:
 GameWindow {
   Scene {
     id: scene
     Dude {
       id: dude
       x: scene.width / 2
       y: scene.height / 2
     }
   }
 }
dude.animate(dude.jumpAnimation);
That's all.
To pause, resume, or stop the animation, the corresponding methods from Animation can be used. The currently running animation can be accessed with the SpineSkeleton::currentAnimation property.
Full example:
 GameWindow {
   Scene {
     id: scene
     Dude {
       id: dude
       x: scene.width / 2
       y: scene.height / 2
     }

     Row {
       anchors.left: parent.left
       anchors.top: parent.top
       spacing: 6
       anchors.margins: 6

       GameButton {
         text: "Start"
         onClicked: {
           dude.jumpAnimation.loops = Animation.Infinite;
           dude.animate(dude.jumpAnimation);
         }
       }

       GameButton {
         text: "Pause"
         onClicked: dude.jumpAnimation.pause();
       }

       GameButton {
         text: "Resume"
         onClicked: dude.jumpAnimation.resume();
       }

       GameButton {
         text: "Stop"
         onClicked: dude.jumpAnimation.stop();
       }
     }
   }
 }
Skins
In the first section of this tutorial we already discussed the possibility of changing the skin of an entity.
The following code shows a button that allows to switch between a male and female goblin:
GameWindow {
Scene {
id: scene
Goblins {
id: goblin
skins.state: "GOBLIN"
x: scene.width / 2
y: scene.height / 2
}
GameButton {
width: 150
text: "Switch skin"
onClicked: goblin.skins.state = "GOBLINGIRL"
}
}
}
It is as easy as that! Every skin you define in the spine editor will be one state of the generated QML object's skins property. By setting the corresponding skin name to skins.state, the skin is
instantly switched.
Note: Be sure to use upper case letters for the skin names when controlling them in QML.
Skin Images
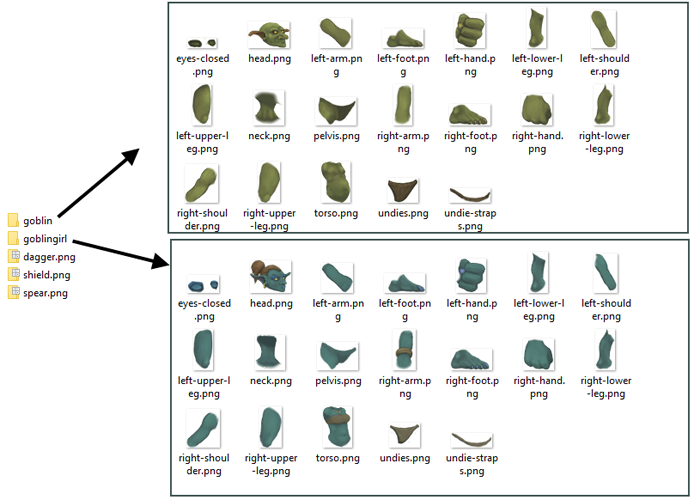
Every skin uses different images of the same name. In your project, there should be one folder for every skin inside the images folder containing those equally-named image files.
Or, on the other hand, if you use spritesheets, the image names should be preceded by the skin name and an underscore.
For our goblin example, it can look either like this:
Or, when using spritesheets, like this (in TexturePacker):
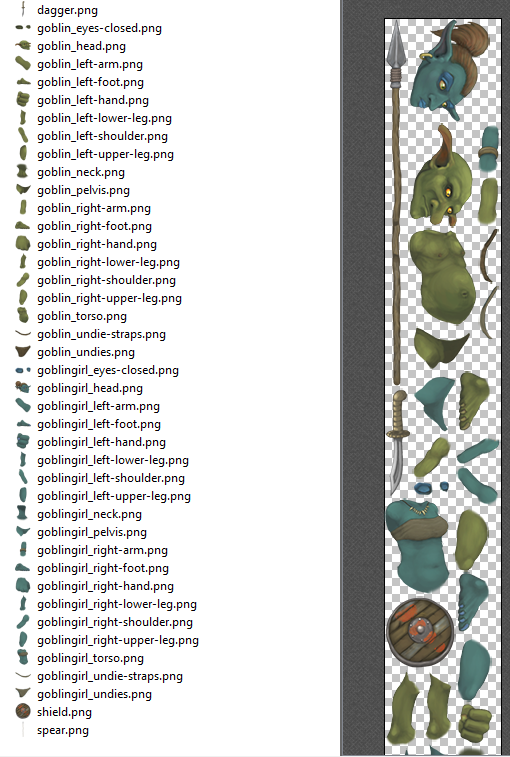
Note: The images spear.png, dagger.png and shield.png are used in both skins and thus are not put in a specific folder or prefixed by anything.
Bounding Box
In many cases, it is important to know the dimensions of entities visible on the screen. For example, if you need to check your player for collisions, this could simply be done by checking the bounding rectangle.
Spine objects provide access to the bounding box via the SpineSkeleton::boundingBox and SpineSkeleton::boundingBoxItem properties.
The bounding boxes have to be calculated whenever the different bones and images change their position, so having them enabled on a lot of objects can have a negative impact on performance. For this reason, SpineSkeleton has a boundingBoxEnabled property, which is false by default. If you need to know your animation's
bounds, be sure to set it to true!
One crucial thing for every game is performance. You do not want your game to become unplayable just because a few entities more join the ones that already exist.
To achieve a good performance with spine entities, please take a look at these points:
- It is tempting to create really cool Spine characters with complex bone structures and amazing animations to make your game look really stunning. But one thing is sure: More complex Spine entities are more computing
intensive than simple ones. This can become a problem if many instances of the same entity will be active at the same time in your game. Always think about how detailed and complex your characters really need to be.
- Free Form Deformation (FFD) is a very cool feature. But it can also have a negative impact on performance. Think carefully about when and where to use FFD in order to keep your game running smoothly.
- The TexturePacker implementation for the Felgo Spine entities is not yet ideal, so the performance might be worse than without packed images. However, it can still be
beneficial to use it because of the multi-resolution support. Especially older devices can save a lot of memory and thus reach a better performance if smaller images are used.
What's Next?
Well, obviously now is the time to get busy and create your own game that uses Spine entities! Have a look at our Felgo Games Examples and Demos to gain more information about game creation
with Felgo and to see the source code of existing games in the app stores.
If you have any questions regarding this tutorial, don't hesitate to visit the Felgo support forums.


