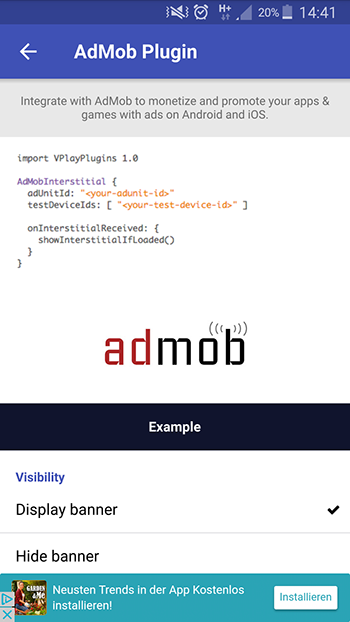
Integrate with AdMob to monetize and promote your apps & games with ads on Android and iOS.

Monetize
Once you have included Felgo AdMob Plugin you can display ad banners and interstitials from Google advertisers in your apps & games. You then get paid every time your users click on ads in your app.
Upsell
Combine the AdMob Plugin with other plugins like in-app purchases to up-sell users from ad-supported apps to ad-free versions.
Overview
The plugin supports all ad types provided by the Google Mobile Ads SDK. In order to use the AdMob plugin, a new AdMob account is required. If you do not have an AdMob account
yet, you can create a new one at http://www.google.com/ads/admob/ or connect AdMob with your Google Account.
Always make sure that your usage of AdMob complies to AdMob's Terms of Service. When you place ads in your apps, always think about the user. You do not want to drive
your users away by overwhelming them with ads. Therefore, it is important to find the right balance. Google created a detailed guide which is recommended to read
before starting off with AdMob.
Ad Types
To monetize your app, you can use Ad Banners, Ad Interstitials and Rewarded Videos.
See the sections below for more details of each of them.
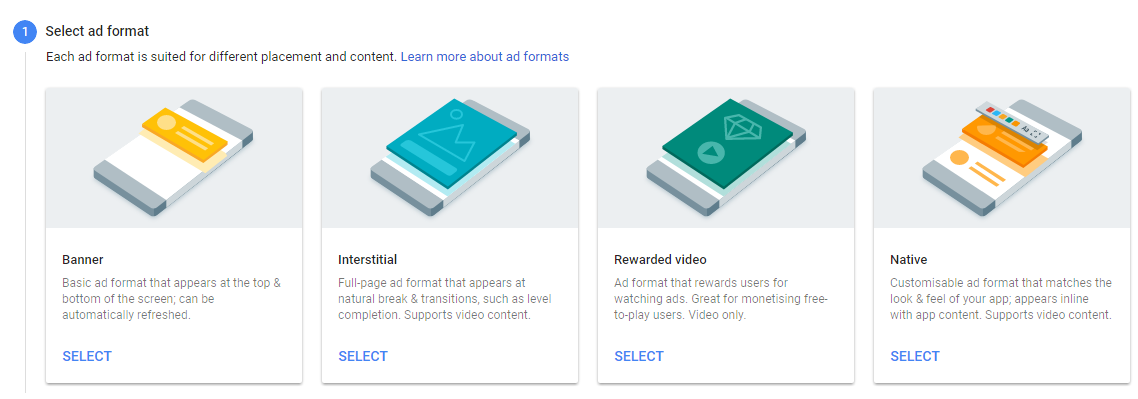
You can combine all of these ad types in your app. In fact, it is recommended to use multiple ad types in different placements of your app to optimize your app monetization.
Ad Banners
Use Ad banners to display ads within your app without distracting your user from the app's main functionality. You can display ad banners with the AdMobBanner item.
Standard Banner Ads
AdMobBanner is the easiest way to show a distraction-free ad. There are five different sizes of banners. For more information please see AdMobBanner::banner.
AdMobBanner shows as an overlay on top of your app, using the AdMob-provided view.
You can also use AdMobBannerNative as a replacement item to render the native ad view directly inside your QML view. AdMobBannerNative
is based on Felgo's Native Code Components and therefore supports displaying other QML items on top of it, z-ordering of items, using opacity, animations and all other QML item
effects.
If you just want to include simple banner ads into your apps, Smart Banners are the best fit. They support all device types and sizes and are easy to use. See Example
Usage for an example. Smart banners automatically choose their size based on the width of the screen.
AdMob also offers a range of different-sized banners. Please note that some of the available sizes can only be used on tablets due to their dimensions.
Banners get only loaded if the QML Item is visible, meaning that it's visible property is not set to false and all its parent items are visible too.
For more information about ad banners have a look at the AdMobBanner and AdMobBannerNative items.
Interstitials
Interstitials are full-screen ads with interactive content that can be presented to the user e.g. when a level of a game was completed or when you your user navigates between two
pages. Their key advantage is they do not take away precious screen space while the app is running.

For more information about interstitials have a look at the AdMobInterstitial item.
Rewarded Videos
Rewarded videos are skippable full-screen videos shown to the user. You can reward the user for watching a full video until the end, e.g. with in-game currency or credits. Rewarded videos are used like interstitials: they
can be shown at any point in time while the appis running and mostly when navigating between pages.
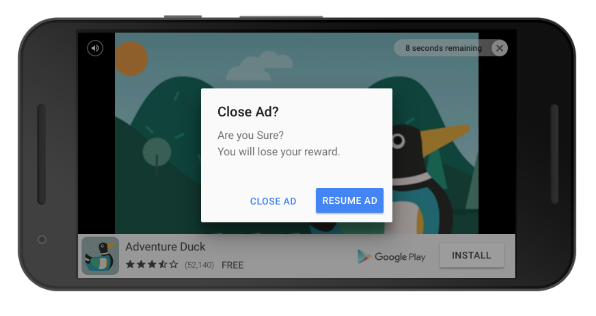
For more information about rewarded videos have a look at the AdMobRewardedVideo item.
AdMob Examples
Plugin Demo App
To try the plugin or see an integration example have a look at the Felgo Plugin Demo app.
Please also have a look at our plugin example project on GitHub: https://github.com/FelgoSDK/PluginDemo.
Example Usage
The AdMobBanner item can be used like any other QML item. Here is a simple example of how to add a SmartBanner at the top of your app with the help of anchoring:
import Felgo
App {
NavigationStack {
AppPage {
title: "Admob Banner"
AdMobBanner {
adUnitId: "ca-app-pub-3940256099942544/6300978111"
testDeviceIds: [ "<a testdevice id>" ]
banner: AdMobBanner.Smart
anchors.horizontalCenter: parent.horizontalCenter
anchors.top: parent.top
}
}
}
}
To show an interstitial ad you can use the following code snippet, which shows the ad after a call to loadInterstitial():
import Felgo
App {
NavigationStack {
AppPage {
title: "Admob Interstitial"
AdMobInterstitial {
adUnitId: "ca-app-pub-3940256099942544/1033173712"
testDeviceIds: [ "<your-test-device-id>" ]
onInterstitialReceived: {
showInterstitialIfLoaded()
}
onPluginLoaded: {
loadInterstitial()
}
}
}
}
}
The same usage applies for rewarded videos, which can be loaded with loadRewardedVideo():
import Felgo
App {
NavigationStack {
AppPage {
title: "Admob Rewarded Video"
AdMobRewardedVideo {
adUnitId: system.isPlatform(System.IOS) ? "ca-app-pub-3940256099942544/1712485313" : "ca-app-pub-3940256099942544/5224354917"
testDeviceIds: [ "" ]
onRewardedVideoReceived: {
showRewardedVideoIfLoaded()
}
onPluginLoaded: {
loadRewardedVideo()
}
}
}
}
}
Rewarded Video with Virtual Currency Example
Here is an example how you can reward the user with virtual currency after he watched a rewarded video ad:
import Felgo
import QtQuick
App {
id: app
property int token: 20
NavigationStack {
AppPage {
title: "Admob"
rightBarItem: NavigationBarItem {
AppText {
anchors.verticalCenter: parent.verticalCenter
text: app.token
color: Theme.isIos ? Theme.tintColor : "white"
font.bold: true
}
}
AdMobRewardedVideo {
id: myRewardedVideo
adUnitId: system.isPlatform(System.IOS) ? "ca-app-pub-3940256099942544/1712485313" : "ca-app-pub-3940256099942544/5224354917"
onRewardedVideoRewarded: (type, amount) => {
app.token += amount
}
onRewardedVideoClosed: {
loadRewardedVideo()
}
onPluginLoaded: {
loadRewardedVideo()
}
}
AppButton {
anchors.centerIn: parent
text: "Token--"
onClicked: {
app.token--
if(app.token < 10) {
myRewardedVideo.showRewardedVideoIfLoaded()
}
}
}
}
}
}
With this example code, you can motivate users to watch an ad because they get something for it. Those users who do not want to watch an ad, can also purchase a virtual currency with the above code example. By only
showing the ad if the user is below a certain virtual currency threshold, you guarantee users who bought a virtual currency pack do not see the ad.
Rewarded ads are the preferred way to use mobile ads these days, so we highly recommend to use this feature in your apps. The perfect time to show a rewarded ad is when a user navigates between pages of your app. For example
after he finished a game or after he had a success moment like completing a level. You could motivate the user even more to watch an ad by giving extra benefits after such a success moment. This helps you to earn money,
while on the other hand giving a benefit to the user - a win-win situation.
Available QML Items
|
AdMobBanner
|
Item allows monetizing your app with banner ads on Android and iOS
|
|
AdMobBannerNative
|
Item allows monetizing your app with banner ads on Android and iOS
|
|
AdMobInterstitial
|
Item allows monetizing your app with fullscreen interstitial ads on Android and iOS
|
|
AdMobRewardedVideo
|
Item allows monetizing your app with rewarded video ads on Android and iOS
|
Adding and Activating Plugins
How to Add a Felgo Plugin to your App or Game
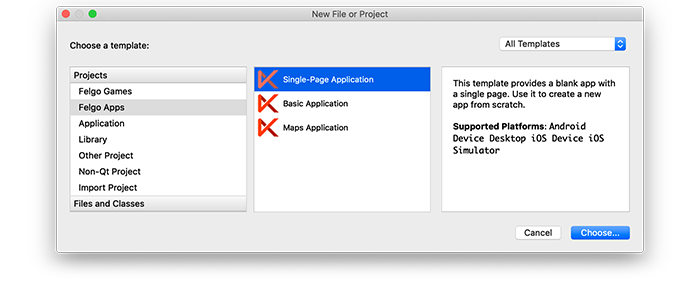
When you create a new project, you can choose to add example plugin integrations as well. Open Qt Creator and choose “File / New File or Project”, then choose Single-Page Application in the Felgo Apps section or any
other wizard. For Felgo Games, you can also find an own Game with Plugins project template as an own wizard.
Then select the platforms you want to run your application on. The plugins are available for both iOS & Android. There is a fallback functionality in place on Desktop platforms so your project still works when you call
methods of the plugins. This allows you to do the main development on your PC, and for testing the plugin functionality you can run the project on iOS and Android.
After the Kit Selection, you can choose which of the plugins you’d like to add to your project:

Then complete the wizard, your project is now set up with all the correct plugin dependencies for Android & iOS automatically. This includes:
- Setting up the
.gradle file for Android.
- Setting up the
.plist file for iOS.
- Setting up the
CMakeLists.txt file to include the plugin libraries for iOS.
Note: Additional integration steps are still required for most plugins, for example to add the actual plugin libraries for iOS to your project. Please have a look at the integration steps described in the
documentation for each of the used plugins.
If you have an existing Felgo application, follow these steps to include a plugin to your app or game:
In Qt Creator, select “File / New File or Project” and choose either Felgo Games or Felgo Apps from Files and Classes. Then select Felgo Plugin and press Choose.
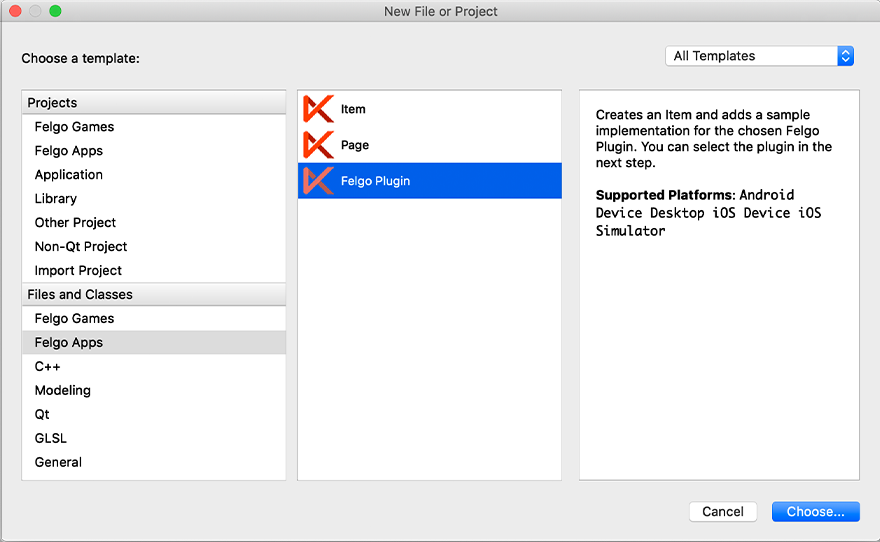
You can now select the plugin you want to add:

The plugin item, which contains the chosen plugin and a short usage example, is now added to your project. To use the item in your project, simply perform these steps:
- Include the created item (use the name you entered in the template before) in your
main.qml file.
- Modify the
CMakeLists.txt file & .plist file for iOS usage. See the iOS integration guide of the chosen plugin for more information.
- Modify the the
.gradle file for Android usage. See the Android integration guide of the chosen plugin for more information.
Note: If you have an existing Qt application, you can also add Felgo Plugins to your app! See here
how to do this.
Activating Plugins with a License Key
You can test all plugins as soon as the required integration steps and plugin configuration are completed.
However, the plugins are only available as Trial Versions if they are not activated with a valid license. When you are using unlicensed plugins, a dialog is shown and a watermark overlays your application to notify you about
the testing state of the plugin.
All monetization plugins are free to use in all licenses, other plugins are only fully usable if you have purchased the Startup or Business license. To activate plugins and enable
their full functionality it is required to create a license key. You can create such a key for your application using the license creation page.
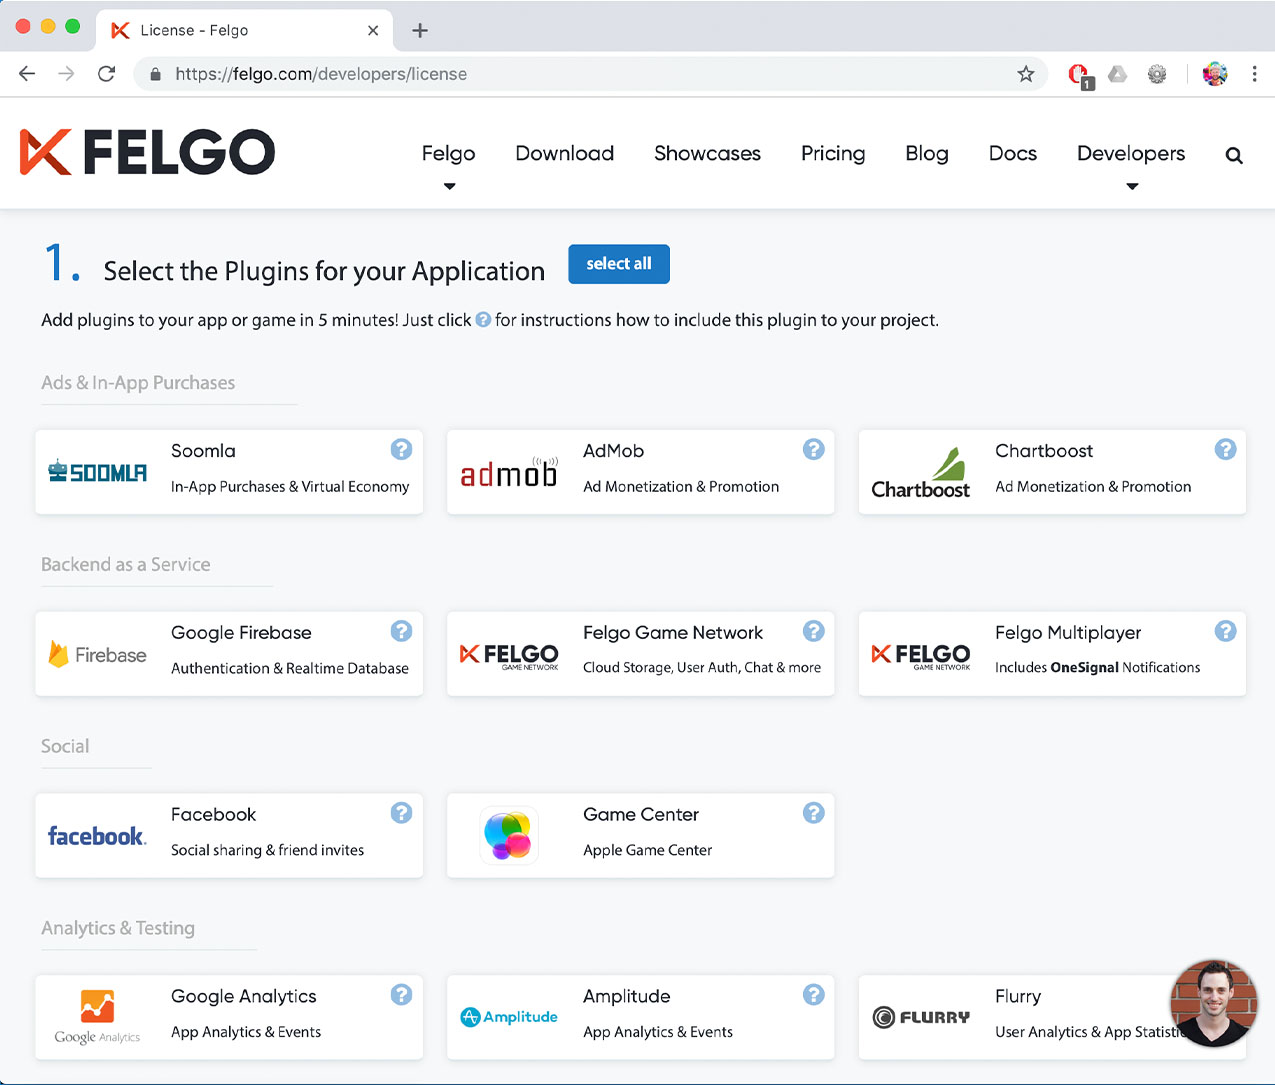
This is how it works:
- Choose the plugins you want to include in your license key:
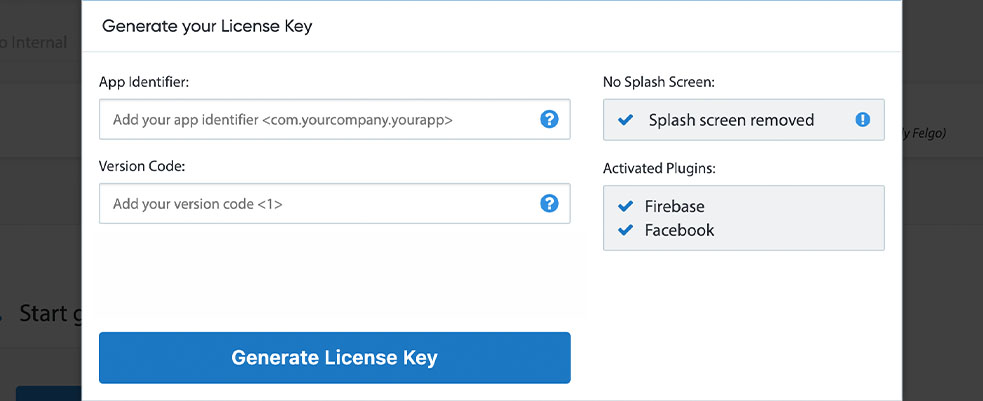
- Click on “Generate License Key” and set the app identifier & version code of your application. You can see that the AdMob plugin was enabled in this license key:
- Copy the generated licenseKey to your GameWindow or App component.
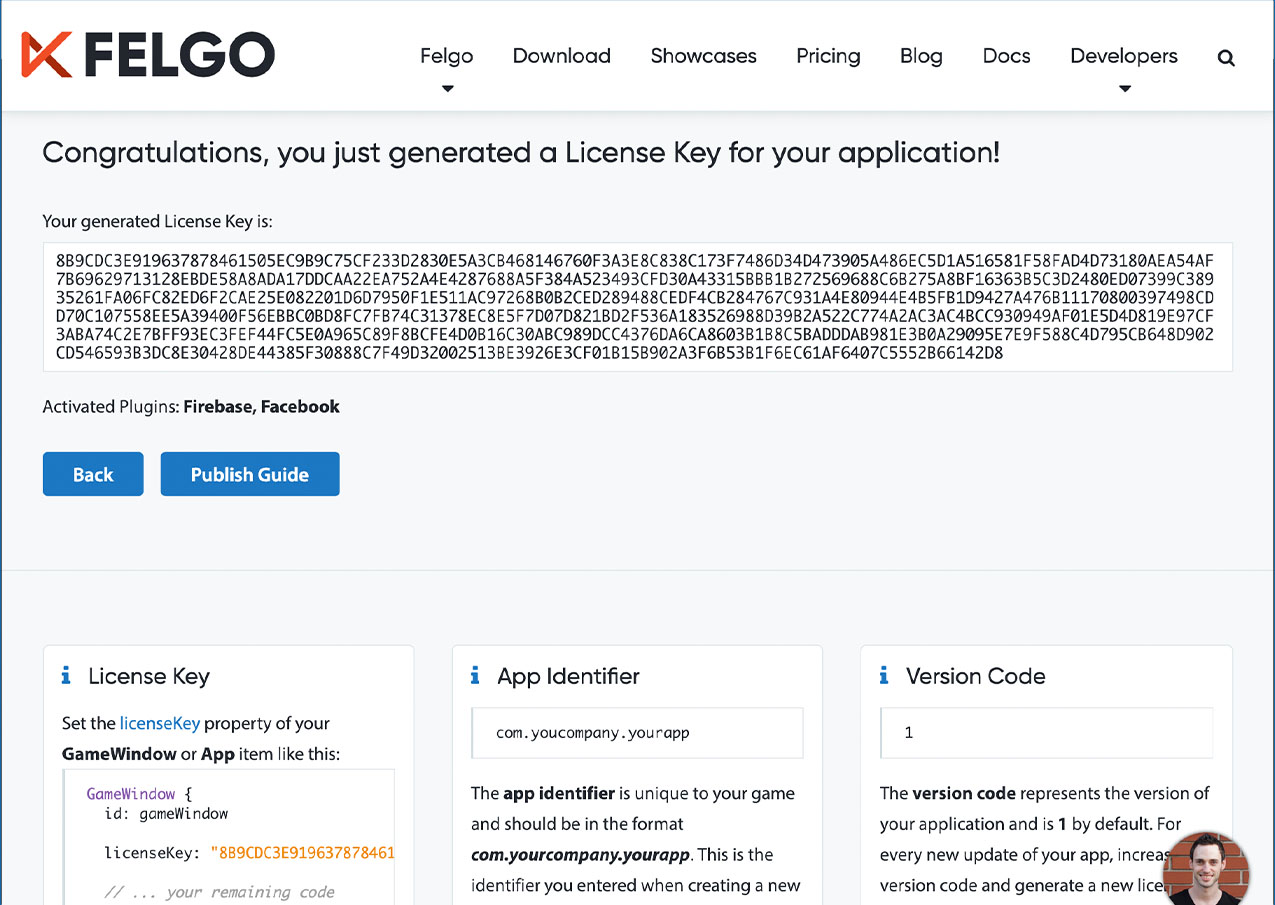
- You can now fully use the selected plugins!
Integration
To use the AdMob plugin you need to add the platform-specific native libraries to your project, described here:
Project Configuration
Add the following lines of code to your CMakeLists.txt file:
 set(FELGO_PLUGINS
    admob
 )
Note: Make sure to declare the FELGO_PLUGINS before calling felgo_configure_executable, which links the required Frameworks based on your settings.
iOS Integration Steps
- Download our PluginDemo from https://github.com/FelgoSDK/PluginDemo/archive/master.zip and unzip it.
- Copy
GoogleMobileAds.framework, GoogleAppMeasurement.framework, GoogleUtilities.framework, PromisesObjC.framework, nanopb.framework and
UserMessagingPlatform.framework from the ios subfolder to a sub-folder called ios within your project directory.
- Add the following entries to your
Project-Info.plist file in the ios subfolder of your project right before the </dict></plist> closing tags:
  <key>NSAppTransportSecurity</key>
  <dict>
      <key>NSAllowsArbitraryLoads</key>
      <true/>
      <key>NSAllowsArbitraryLoadsForMedia</key>
      <true/>
      <key>NSAllowsArbitraryLoadsInWebContent</key>
      <true/>
  </dict>
  <key>GADApplicationIdentifier</key>
  <string>ca-app-pub-(your-app-id)</string>
 <key>NSUserTrackingUsageDescription</key>
 <string>This identifier will be used to deliver personalized ads to you.</string>
This ensures that the delivery of ads is not affected by the App Transport Security feature introduced with iOS 9, as described here.
You can find your AdMob app ID at the AdMob console.
Android Integration Steps
- Open your
AndroidManifest.xml file and add the following lines to the application block. You can find your AdMob app id in the AdMob app console.
 <application ...>
     <activity ...>

     <!-- Sample AdMob app ID: ca-app-pub-3940256099942544~3347511713 -->
     <meta-data
         android:name="com.google.android.gms.ads.APPLICATION_ID"
         android:value="ca-app-pub-xxxxxxxxxxxxxxxx~yyyyyyyyyy"/>
 </application>
Note: For testing, you can use the sample ID as shown above. For publishing your app, use your use your actual AdMob app ID. You can find more information in the official AdMob documentation.
- Open your
build.gradle file and add the following lines to the dependencies block:
 dependencies {
   implementation 'com.felgo.plugins:plugin-admob:4.+'
 }
Note: If you did not create your project from any of our latest wizards, make sure that your project uses the Gradle Build System like described here.
Used AdMob SDK Versions
| iOS |
Google Mobile Ads SDK 8.2.0 |
| Android |
Google Play Services Ads 22.4.0 |
Note: Other SDK versions higher than the stated ones might also be working but are not actively tested as of now.


