Felgo 2.11.0 adds many improvements to Felgo plugins:
- All monetization plugins for in-app purchases and advertisements are now free to use in all licenses, including the Personal License!
- You can test all other plugins (for analytics, push notifications, crash reporting, beta distribution) in your free license too.
- It is a lot easier now to add these plugins to your projects with the new plugin templates.
- The Google Firebase plugin is new – you can use it for user authentication and to access the Firebase Realtime Database.
Free Monetization Plugins for all Felgo Developers
Many developers ask us: “I’d like to earn money with my app/game, but can’t afford the Indie license as I’m doing this as a hobby. What can I do?”
We decided to make this decision easy. Starting with this Felgo release, you can use all monetization plugins for free, and you don’t need an Indie/Enterprise license to make money with your app or game!
The now-free monetization plugins include:
- Soomla Plugin for cross-platform in-app purchases and virtual currencies
- Advertisement plugins to show interstitial ads, banner ads and rewarded videos with Google AdMob and Chartboost
We don’t charge any revenue share, all the revenue you make is yours. And if your app is doing well and you’re earning more than $50,000 a year, the Indie license (which is $49 per month) is the right choice. The Indie license has a few additional benefits – you can:
- Remove the Felgo Splash Screen.
- Also use all the other plugins, such as those for advanced analytics, push notifications, crash reporting and beta distribution.
- Get advanced email support.
To sum it up, the Indie license is for established companies who are already earning revenue. And for starting your app or game business, you can now use all the monetization options available in the higher-tier licenses.
How to Add a Felgo Plugin to your App or Game
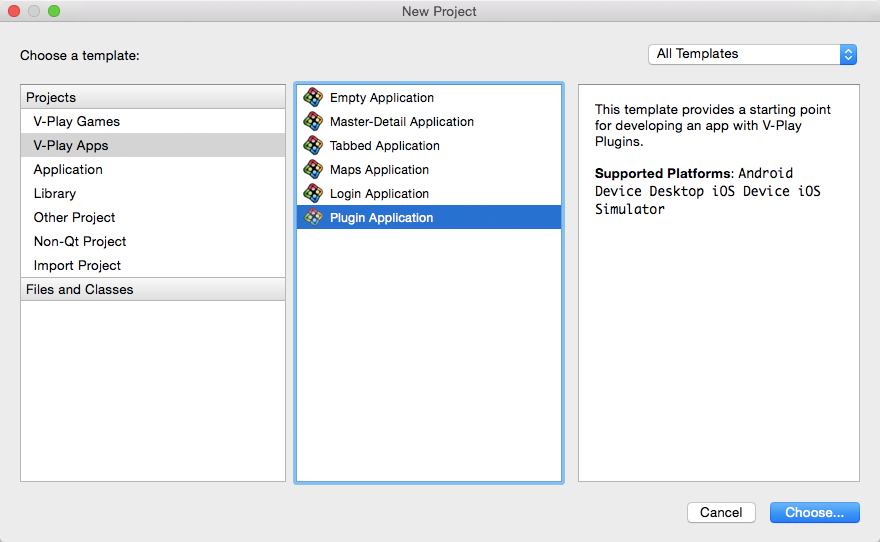
When you create a new project, you can now choose the Plugin Application template. Open Qt Creator and choose “File / New File or Project”, then select Plugin Application in the Felgo Games or Felgo Apps section.
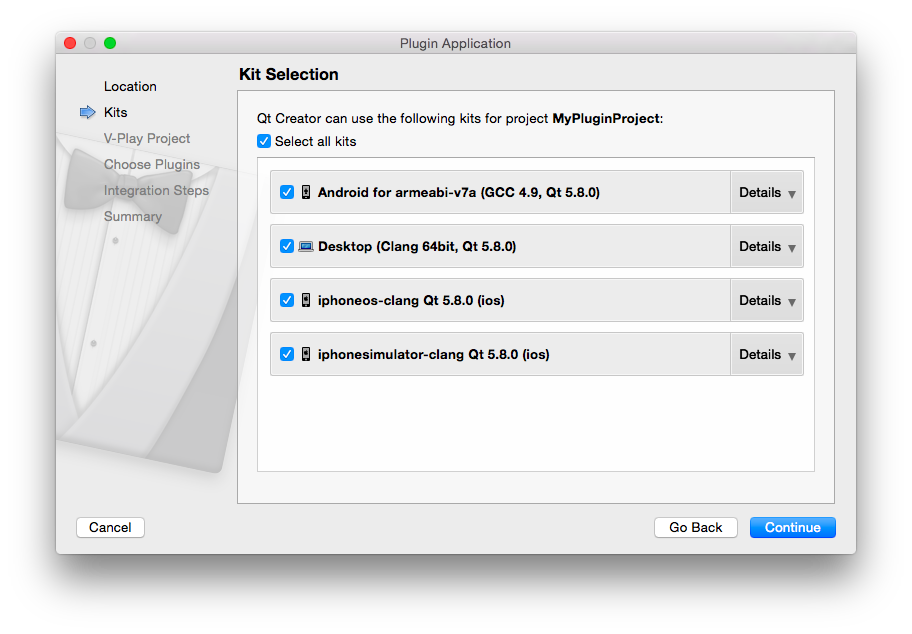
Then select the platforms you’d like to add the plugins for. The plugins are available for iOS & Android. There is a fallback functionality in place on Desktop platforms so your project still works when you call methods of the plugins. This allows you to do the main development on your PC, and for testing the plugin functionality you can run the project on iOS and Android:
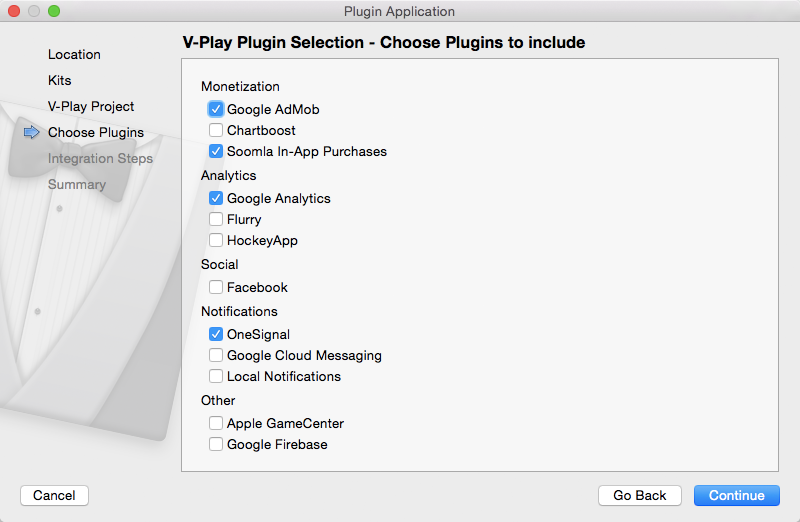
You can then choose which of the plugins you’d like to add to your project:
Your project is now set up with all the correct plugin dependencies for Android & iOS automatically. This includes:
- Setting up the .gradle file for Android.
- Setting up the .plist file for iOS.
- Setting up the .pro file to include the plugin libraries for iOS.
How Can I add a Plugin to an Existing Application?
If you have an existing Felgo application, follow these steps to include a plugin to your app or game.
Note: If you have an existing Qt application, you can also add Felgo Plugins to your app! See here how to do this.
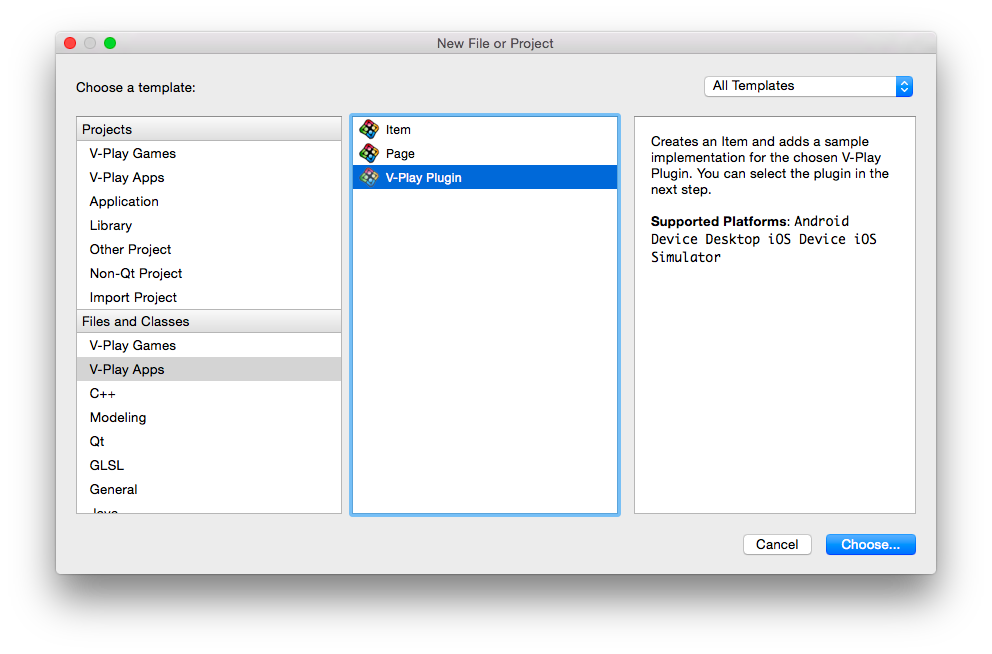
In Qt Creator, choose “File / New File or Project” and choose either Felgo Games or Felgo Apps from Files and Classes. Select Felgo Plugin and press Choose.
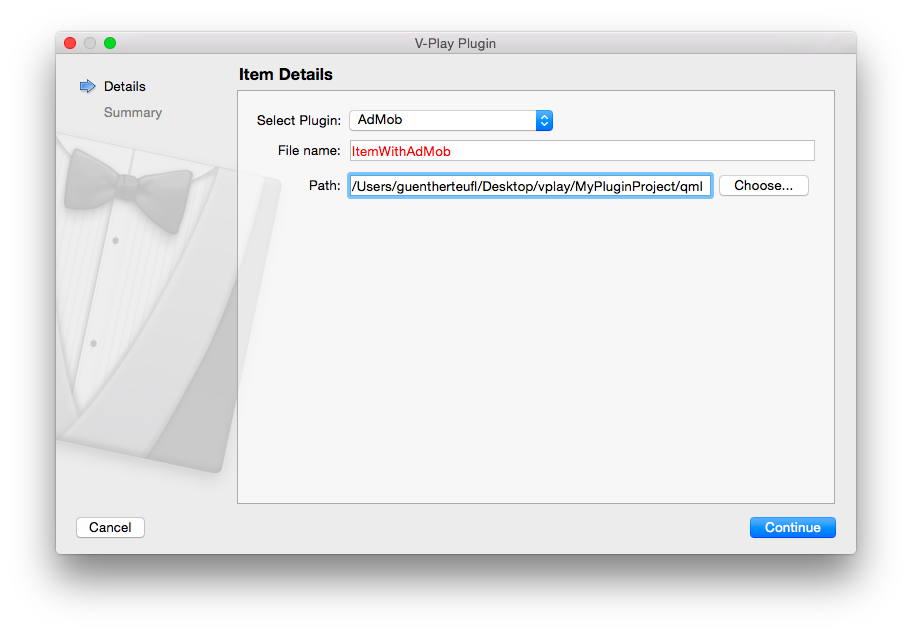
You can now select the plugin you want to add, in this example we’ve chosen AdMob:
The AdMob item is now added to your project. The created item contains ready-to-use ad identifiers so you can try it quickly without having to create an own account. You can of course also change these to your ad ids. The created item looks like this:
import Felgo 3.0
import QtQuick 2.0
import Felgo 3.0 // only used for ListView with Plugin Overview and Example

/*
 EXAMPLE USAGE:
 Add the following piece of code inside your main QML { } to display this example page.

 ItemWithAdMob {

 }

*/

Rectangle {
 anchors.fill: parent

 // Plugin Item
 AdMobBanner {
   id: adMobBanner
   adUnitId: "ca-app-pub-9155324456588158/9913032020" // replace with your AdMob adUnitId
   banner: AdMobBanner.Smart

   anchors.horizontalCenter: parent.horizontalCenter
   anchors.bottom: parent.bottom
 }

 // Plugin Item
 AdMobInterstitial {
   id: interstitial
   adUnitId: "ca-app-pub-9155324456588158/9075427220" // replace with your AdMob adUnitId
 }

 // AppListView for Plugin Overview and Example Usage
 AppListView {
 // example usage of the plugin, removed here for brevity ...
 }
}
To use the item in your project, simply perform these steps:
- Include the ItemWithAdMob (use the name you entered in the template before) in your main.qml file.
- Modify the .pro file & .plist file for iOS usage. See the iOS integration guide for AdMob here.
- Modify the the .gradle file for Android usage. See the Android integration guide for AdMob here.
How to Test All Plugins – New Plugin Trial
With this release, you can test all plugins that are included in the Indie & Enterprise license in your free license too. There are plugins for analytics, push notifications, crash reporting, beta distribution and more.
The full functionality of a plugin is available for testing. When you are calling a method from the plugin, for example AdMob::showInterstitial(), there is a dialog shown and a watermark in your application to notify you about the testing state of the plugin.
If you have purchased the Indie or Enterprise license, you can remove these notifications and fully use all plugins in your apps by creating a license key. As the monetization plugins are now free to use in all licenses, you can also enable their full functionality on the license creation page.
This is how it works:
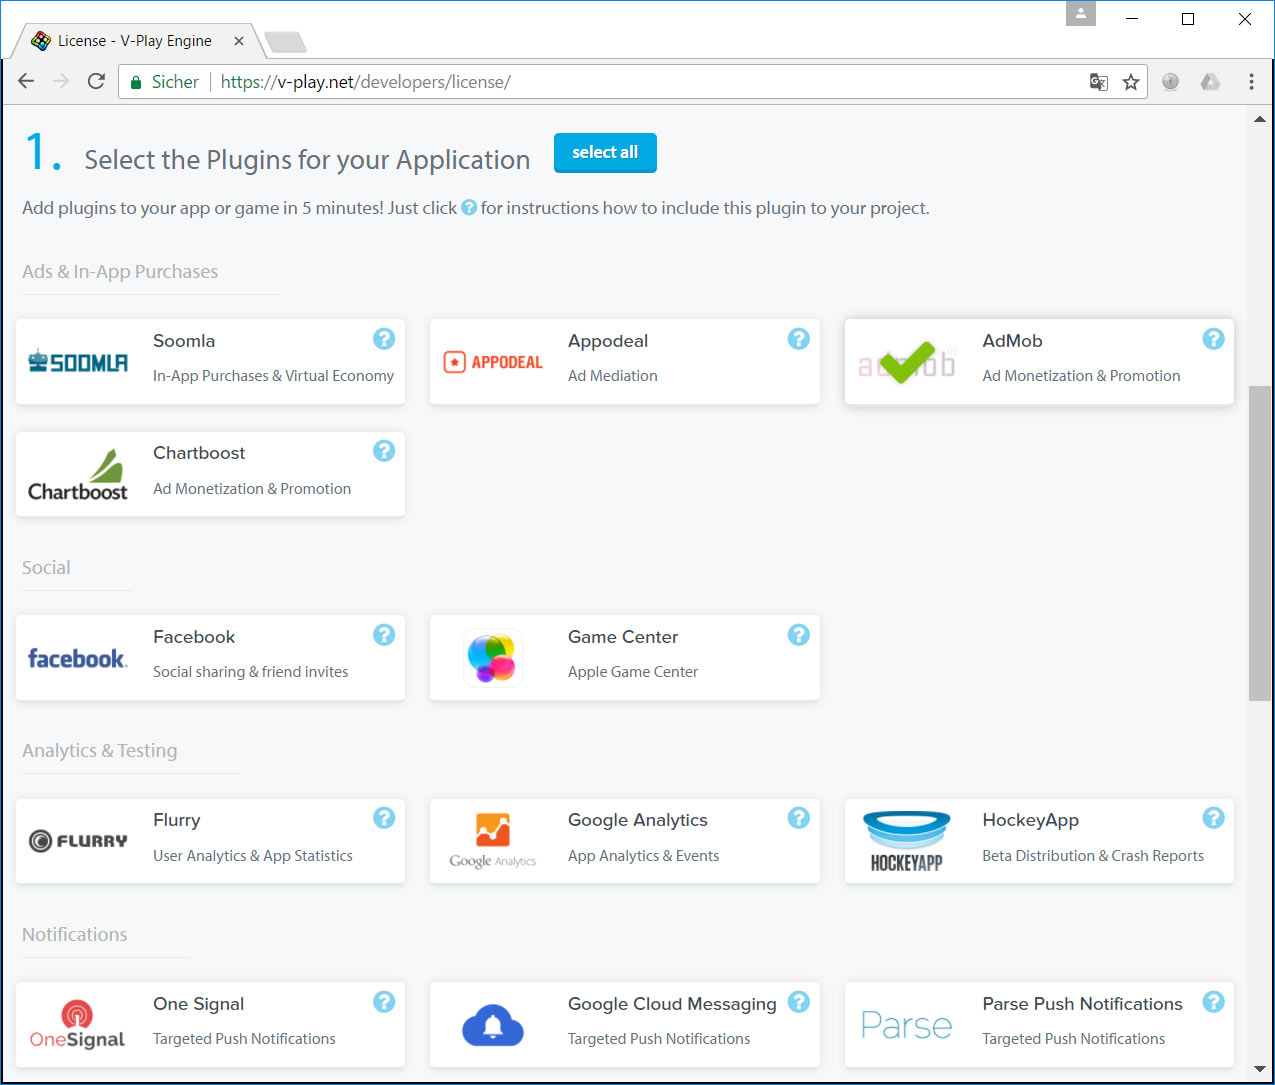
1. Choose the plugins you want to include in your license key:
2. Click on “Generate License Key” and set the app identifier & version code. You can see that the AdMob plugin was enabled in this license key:

3. Copy the generated licenseKey to your GameWindow or App component.
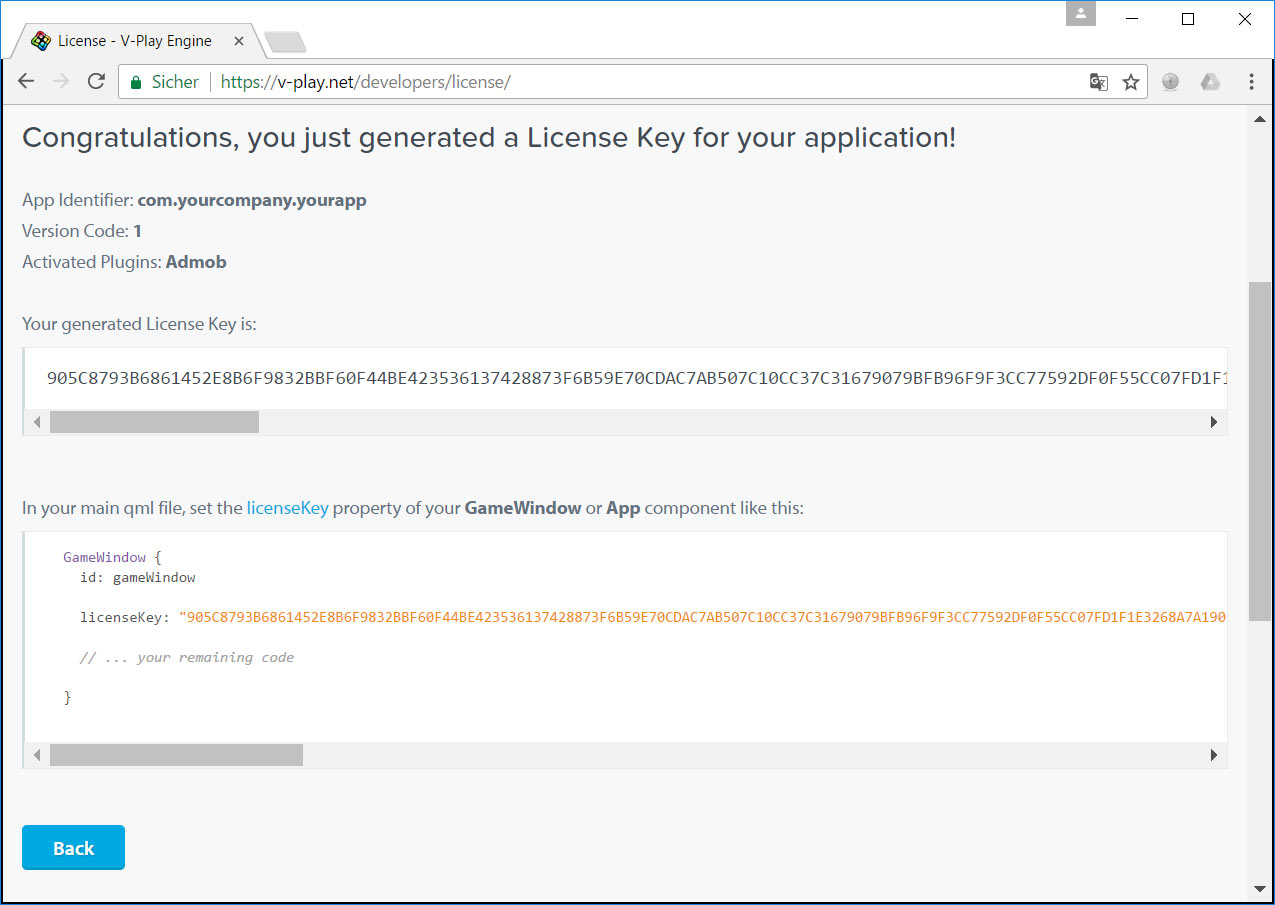
4. You can now fully use the plugins!
New Firebase Qt Plugin
With the new Firebase plugin, you can:
- Use Firebase Authentication for user authentication via email. This includes account creation, password recovery and of course login and logout functionality. This does not require your own backend.
- Use the Firebase Realtime Database to store and sync data with the Firebase NoSQL cloud database. Data is synced across all clients in realtime, and remains available when your app goes offline.
The Firebase plugin comes with various examples and extensive documentation on how to use it. You can find it here.
Firebase Authentication
Most apps need to know the identity of a user. Knowing a user’s identity allows an app to securely save user data in the cloud and provide the same personalized experience across all of the user’s devices.
Firebase Authentication provides backend services to authenticate users in your app. The plugin currently supports authentication using e-mail and passwords. Additionally, the Firebase plugin comes with a “forgot password” feature, which you can easily use in your application without tedious setup.
You can design the login screen completely customized for your app. If you don’t want to do that, we’ve got you covered as well: You can easily create a login page template using our wizard. Just click File -> New File or Project -> Felgo Apps -> Page and in the next step, select Login Page as Page Type.
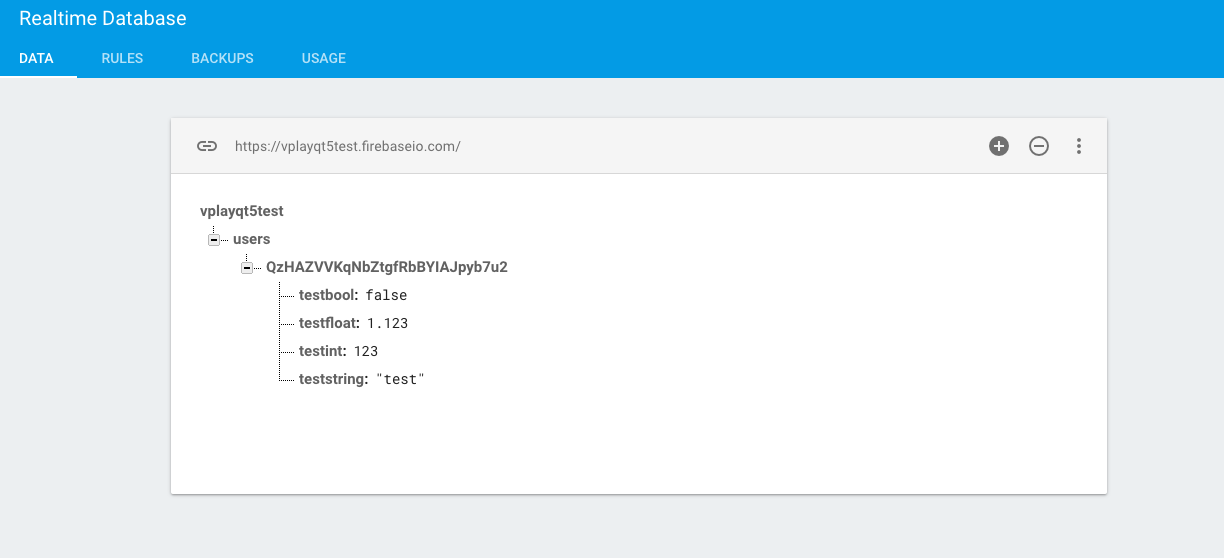
Firebase Realtime Database
Use the Firebase Realtime Database to store and sync data with the Firebase NoSQL cloud database. Data is synced across all clients in realtime, and remains available when your app goes offline.
The Firebase Realtime Database is a cloud-hosted database. Data is stored as JSON and internally synchronized in realtime to every connected client.
When you build cross-platform apps with the Realtime Database, all of your clients share one Realtime Database instance. The Firebase backend automatically receives updates with the newest data as soon as the database is changed by one of the clients. Additionally, changes to the database are propagated to other clients and can be read by the clients in real time.
As an alternative to Firebase, Felgo also comes with its own easy to use WebStorage component, which connects to the Felgo backend. It is a simple key-value store which syncs across different devices and platforms via the Felgo Game Network Backend as a Service (BaaS).
More Fixes & Improvements
Besides the highlights mentioned above, there are many other fixes and improvements for the SDK. For a full list of improvements and fixes to Felgo in this update, please check out our change log!
How to Update Felgo
Test out these new features by following these steps:
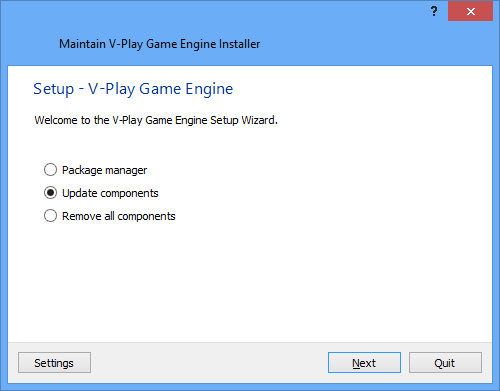
- Open the Felgo SDK Maintenance Tool in your Felgo SDK directory.
- Choose “Update components” and finish the update process to get Felgo 2.11.0 as described in the Felgo Update Guide.
If you haven’t installed Felgo yet, you can do so now with the latest installer from here. Now you can explore all of the new features included in Felgo 2.11.0!
For a complete list of the changes to Felgo with this update, please check out our change log!
More Posts like This
How to Make Cross-Platform Mobile Apps with Qt – Felgo Apps
Release 2.10.1: Felgo Apps, TexturePacker & Qt 5.8 Improvements