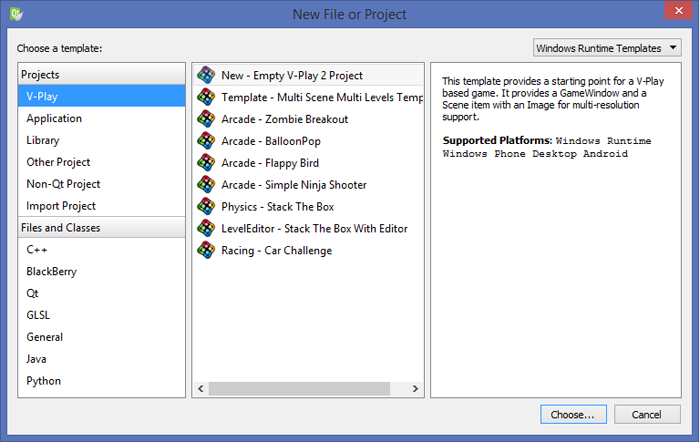
After installing the Felgo SDK like described in Felgo Installation, create a new project with File/New. Choose the Empty Felgo 2 Project like it is shown in the image below.

Now specify a project location, build targets (Kits) and project details.
Note: The App identifier can only contain uppercase or lowercase letter, numbers or periods to succeed to the next step. See the license information in the publishing documentation for more information about the identifier.

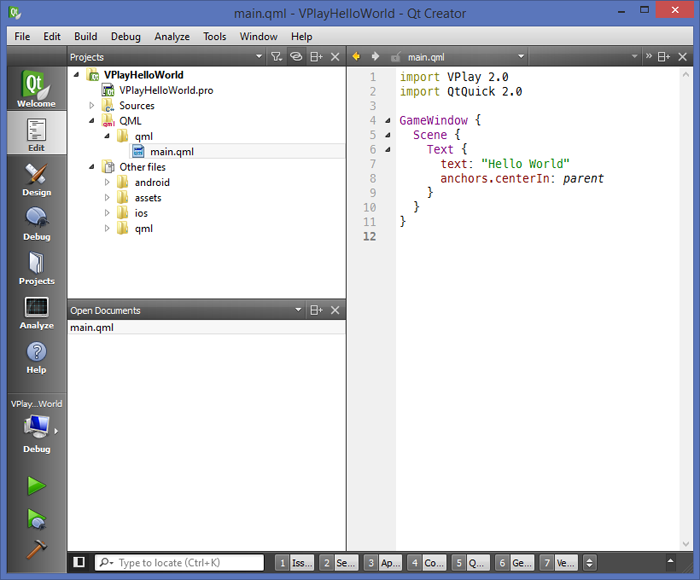
Afterwards, the main.qml file is opened which contains the GameWindow and Scene components which is the basis for every resolution-independent Felgo game.
The Qt Creator IDE is a powerful development environment available for all desktop systems including Windows, Mac and Linux. For a full documentation of Qt Creator see the Qt Creator Manual.

On the left sidebar the main edit modes are available:
The integrated help is the primary source for documentation about the Felgo Games. There are 2 ways to use the integrated help of Qt Creator:
Ctrl+7F1. This will automatically search the integrated help and open the help window. This is the suggested work-flow as it is
quicker than searching the web or the index manually, because you are directly navigated to the documentation of the component, method or property.To get out most of Qt Creator, the following shortcuts are very useful:
| Shortcut | Meaning |
|---|---|
| Alt + Key left / right | Navigate to previous used / next document |
| F2 | Go into component |
| Ctrl + Space | Perform auto-completion |
| Ctrl + Alt + Space | Open QML helper for the currently selected item or property (like a color picker, animation selector, etc.) |
| Ctrl + K | Searches all files in all open projects |
| Ctrl + / | Toggle comment selection |
| Ctrl + 1-7 | Switch between editor modes |
| Alt + 0 | Show sidebar |
| Alt + 1-5 | Switch between output pane |
| Ctrl + Shift + F | Open advanced find |
| Ctrl + Shift + U | Find usage of selected id |
| Ctrl + Shift + R | Refactor & Rename |
It is also convenient to split the Projects-View on the left side into a Projects-View PLUS an Open Documents-View. Just select the Split button next to the Close button of the Projects-View and then change Projects to Open Documents.
QML stands for "Qt Markup Language" and is a declarative language designed to describe the user interface of a program: both what it looks like, and how it behaves. In QML, a user interface is specified as a tree of objects with properties. This tree is also often referred to as Scene Graph.
In this section we will cover the mere basics of QML and will create a custom button and place it in a screen-resolution-independent Scene.
First of all, clear the content of the main.qml, we will add our own code.
The most basic Felgo application consists of a GameWindow and a Scene, like this:
 import Felgo // for accessing the Felgo gaming components
 import QtQuick // for accessing all default QML elements

 GameWindow {
   Scene {

   }
 }
We are now adding a simple button with the following source code:
 import Felgo // for accessing the Felgo gaming components
 import QtQuick // for accessing all default QML elements

 GameWindow {
     Rectangle {
         // background rectangle filling whole screen with black color
         color: "black"
         anchors.fill: parent
     }

     Scene {
         Rectangle {
             color: "lightgrey"
             x: 100
             y: 50
             width: 100
             height: 40

             Text {
                 text: "Press me"
                 color: "black"
                 anchors.centerIn: parent
             }

         }
     }
 }
Just press the green run button on the bottom left of Qt Creator and the application will launch!
The code example shows some of the QML characteristics:
Let's go one step further and make the button click-able and let it follow user touches. There exists a component that handles touch or mouse input: MouseArea.
Let's assume the text of the Text element should change to Pressed when the user clicks the button, the color should turn green and the button should follow the mouse. Sounds complicated? Well
it's as easy as that:
 Rectangle {
     id: button
     color: "lightgrey"
     x: 100
     y: 50
     width: 100
     height: 40

     Text {
         id: buttonText
         text: "Press me"
         color: "black"
         anchors.centerIn: parent
     }

     MouseArea {
         id: buttonMouseArea
         anchors.fill: parent // make the touchable area as big as the button
         drag.target: button // this forwards the dragging to the button

         onPressed: {
             // change the properties
             button.color = "blue"
             buttonText.text = "Pressed"
         }
         onReleased: {
             // reset to initial property values
             button.color = "lightgrey"
             buttonText.text = "Press me"
         }
     }

 }
You can see that references to other components are handled with the id property. Items are accessible with this id from the whole qml file and thus it must be unique, otherwise an error is
reported.
We can now extend this example to count how often the button was pressed and display the amount in another text element, and show an image after it got pressed at least 6 times. Therefore we need to define an own property
pressCount and are using a great feature of QML called property propagation: When a property changes its value, it can send a signal to notify others of this change. You can listen to that
change by adding a on<PropertyName>Changed signal handler like the following:
 Rectangle {
     id: button
     color: "lightgrey"
     x: 100
     y: 50
     width: 100
     height: 40

     onXChanged: console.debug("x changed to", x)
 }
The great thing is, you can put arbitrary complex JavaScript expressions into the signal handlers, which allows listening to state changes and thus fast, readable and very little code in your games. In addition, changes of properties are detected automatically if you put them inside an expression. This may sound complex at first, but let us have a look at the solution for the above example:
 Scene {
     id: scene

     property int pressCount: 0 // initialize with 0, increase in onPressed

     Text {
         text: "PressCount: " + scene.pressCount // this will automatically update when pressCount changes
         color: "#ffffff" // white color, open up color picker with Ctrl+Alt+Space
     }

     Image {
         // position the image at the right center
         anchors {
             right: parent.right
             verticalCenter: parent.verticalCenter
         }
         source: "felgo-logo.png"
         visible: scene.pressCount>5 // only display when pressCount is bigger than 5
     }

     MouseArea {
             onPressed: {
                 // change the properties
                 button.color = "blue"
                 buttonText.text = "Pressed"

                 scene.pressCount++ // increase pressCount by 1
             }
     }
 }
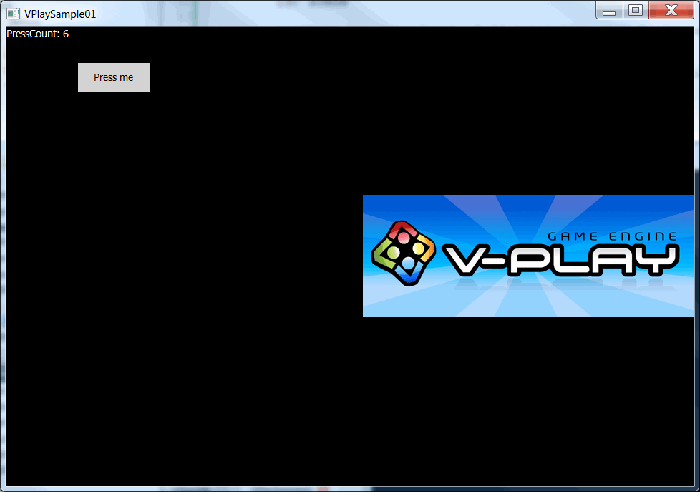
So the image will only be visible when the button was pressed at least 6 times, and the text will automatically change whenever the pressCount property gets changed. This is the result how it will
look like:

There are many more items available in QML, but the above mentioned are the most important. For a list of most useful QML components see here. In addition to these QML items, you can use the Felgo Games which are specialized for 2D games.
In the next guide, we examine the most important Felgo Games and will create a simple game using physics, particle effects and audio across all platforms. Follow the link to Entity Based Game Design