A cloud-hosted development environment for Qt & Felgo projects, accessible from anywhere in a web browser.
Get Started
Felgo Cloud IDE is a browser-based code editor with support for Git repositories. You can host and open your Qt or Felgo project, edit code, and preview your app, all within the same browser window.
You can also access the documentation, use the integrated issue tracker, and commit your work to Git to continue developing locally with your Felgo SDK installation anytime.
Felgo is an official GitLab Technology Partner. The Cloud IDE extends GitLab and thus offers full Git integration and project management capabilities in
addition to useful features that support your Qt project development.

The Cloud IDE fully works in your web browser, you don’t have to install Felgo or any other tools on your PC. Therefore, it is the fastest way to get started and make or preview changes for your projects.
Cloud IDE is Git-centric, so every project is maintained within a Git repository. To open a project in Cloud IDE, open the project page and look for the “Web IDE” button:

Start with an Empty Project or Project Template
To start your project from a template, open the New project page and open the “Create from template” tab and the “Felgo templates” subtab.

Choose a project template by selecting the “Use template” button.
Start with a Demo
Felgo offers a number of open-source demos and examples. You may use them as a starting point for your own apps, or just copy parts of it to speed up your development.
To start your project from a demo, open the New project page and open the “Create from template” tab and the “App Demos” subtab.
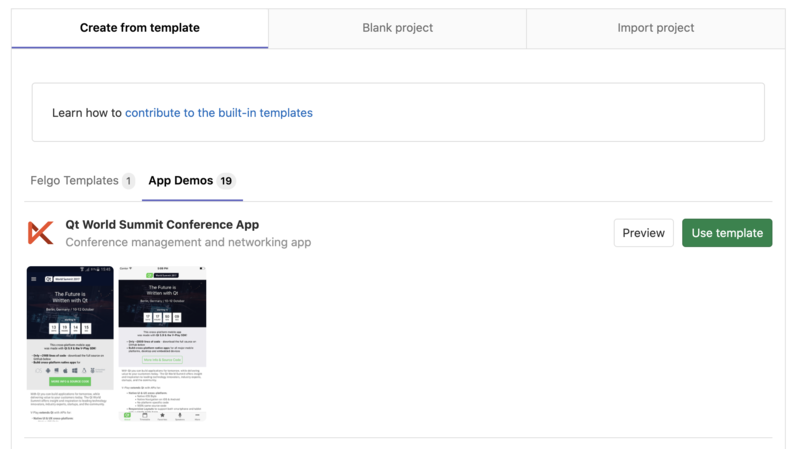
Choose a demo by selecting the “Use template” button.
Import a Project
Cloud IDE allows importing existing projects from external code hosting services.
To import an existing project, open the New project page and open the “Import project” tab.
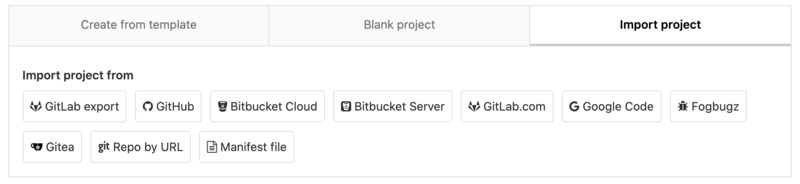
Select the hosting provider from which you want to import a project and proceed with the subsequent steps.
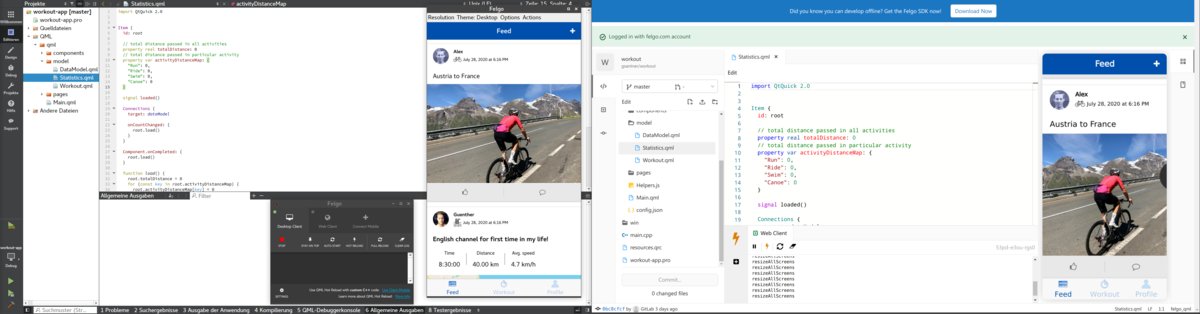
IDE Overview
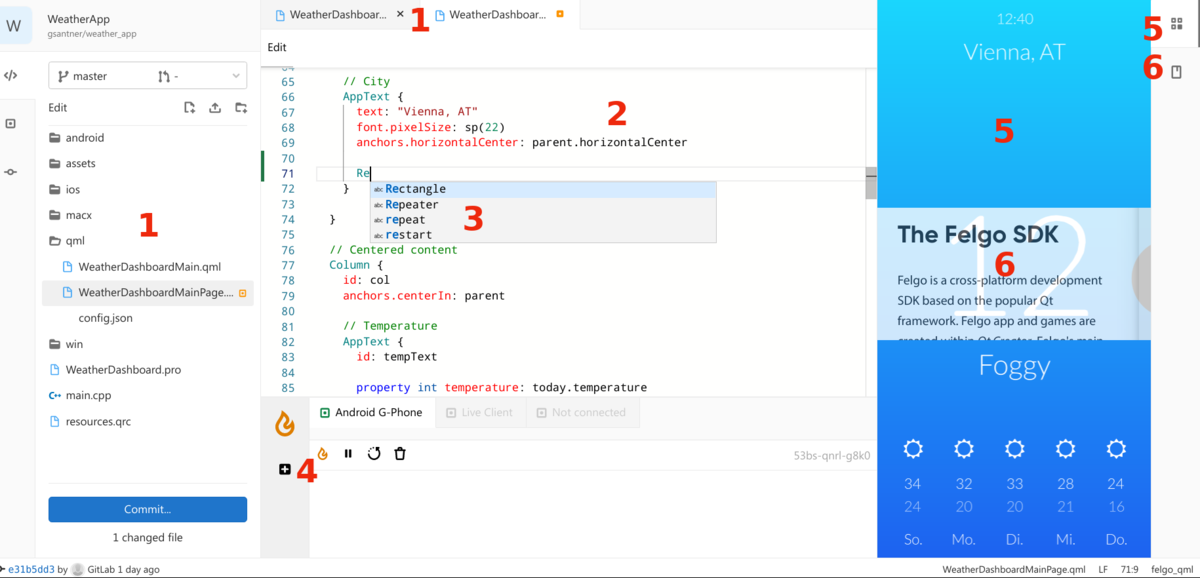
- In the left sidebar, you browse & create new files and open them in the editor. Already open files are shown as tabs on the top.
- In the center is the editor which shows the file contents and allows you to edit it.
- Felgo Cloud IDE supports syntax highlighting and code completion for Qt and Felgo projects.
- The editor fully integrates with Felgo Hot Reload and supports multiple connected devices. Use the “Connect” button to connect additional mobile devices running the Felgo Developer App. Click the “Reload” icon or press
Ctrl+S (or Cmd+S for macOS users) to reload the current state on all connected devices. Every time you change your code, your app will be updated instantly to show the latest changes.
- The Web Client represents the live preview of your app. It is already connected when opening a project and shows a live preview in the right sidebar (it even allows to switch between Android and iOS themes for a full
device preview).
- In the right sidebar, you can also switch to the “Felgo API Documentation” to get more information about APIs, Felgo, Tools & more.
Live Preview with the Web Client
Felgo includes a live preview window directly inside the Cloud IDE, which supports code hot reloading while developing.
Every time you change your code and Press Ctrl+S (or Cmd+S for macOS users), your app will be updated instantly to show the latest changes.
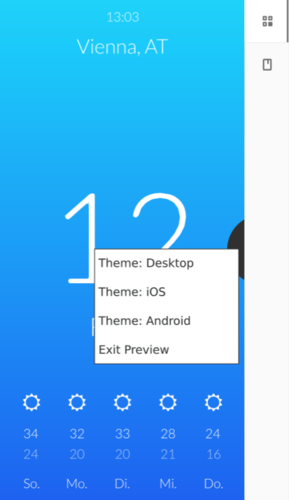
You can use the overlay menu within the preview to switch to different themes, it’s the easiest way to see how it would look on an Android / iOS device without trying it on one.
Live Preview with a Mobile Device
In addition to the Web Client, you can also connect devices running the Felgo Developer App on iOS & Android:
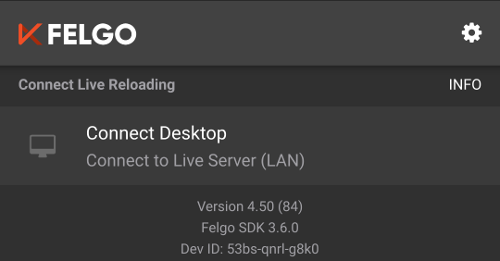
- Start the Felgo Developer App on your mobile device and note the “Dev ID”:
- Click the “Connect a Device” button in the Cloud IDEs bottom menu and enter the Dev ID:
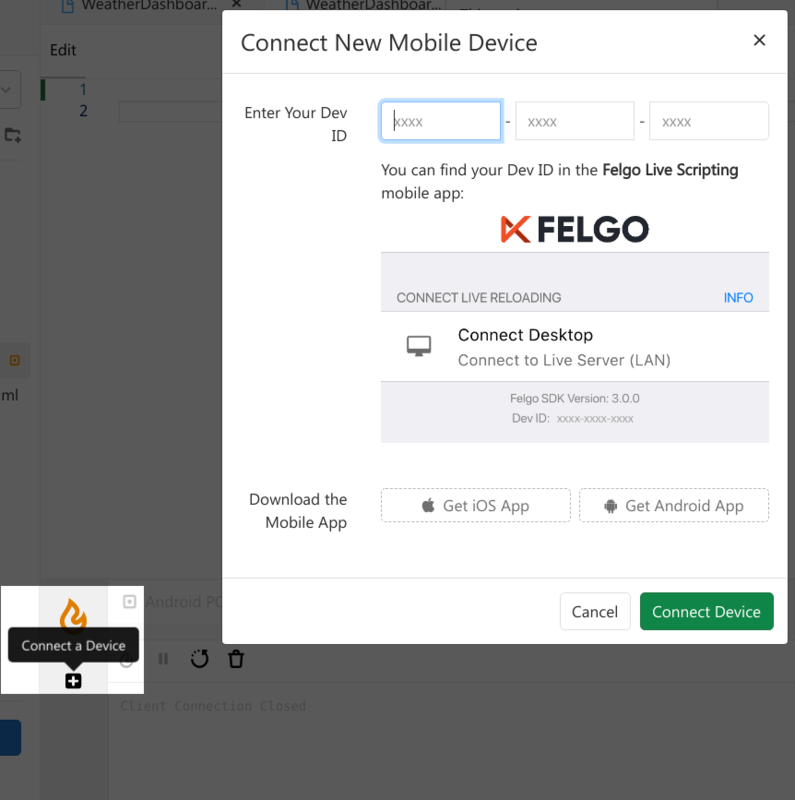
- The device now connects to Cloud IDE and you can use it for a live preview of your opened project.
Documentation
The Felgo API Documentation is located at the right sidebar of the Cloud IDE. If the documentation is not visible, click the documentation tab button.
You can also hover a component in the editor and press the F1 key to show the documentation for the component.
Save and Commit Changes
To save your work, you need to commit your changes in the underlying Git repository.
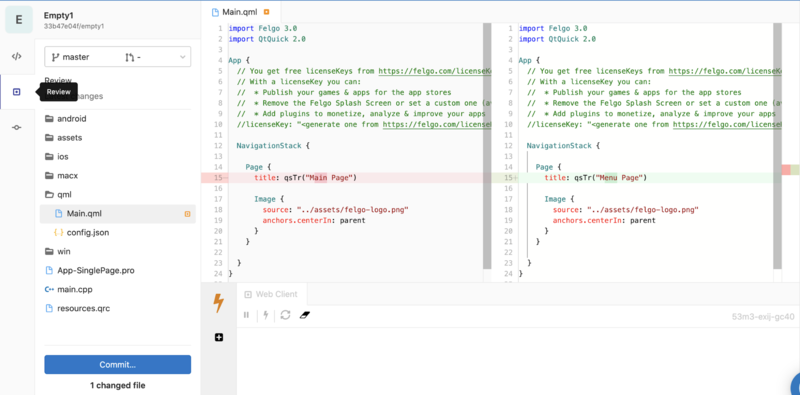
To review your changes, open the “Review” pane from the left sidebar:
To commit your changes, open the “Commit” pane from the left sidebar:
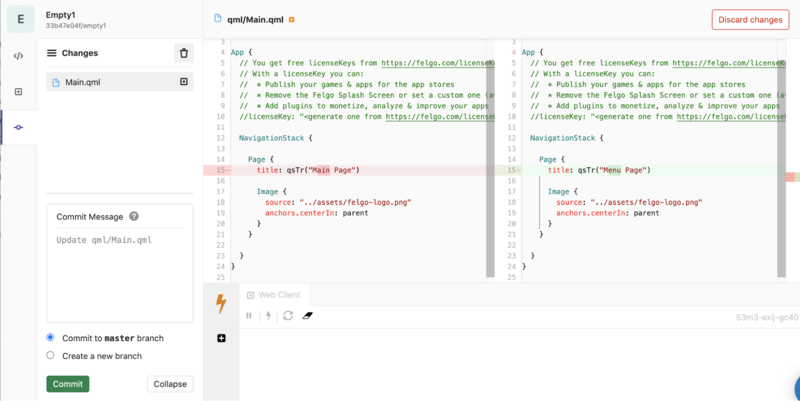
Provide a commit message and save your changes with the green “Commit” button.
Install Felgo and Work Locally
Besides the Felgo Cloud IDE, you can also use “Qt Creator” to develop on your desktop. You can clone the Git repository from Felgo Cloud IDE to your local PC and continue working on it.
- Download the Felgo SDK from here and install it on your PC.
- Find the Git clone URL from the project page, clicking the blue "Clone" button in the right top corner:
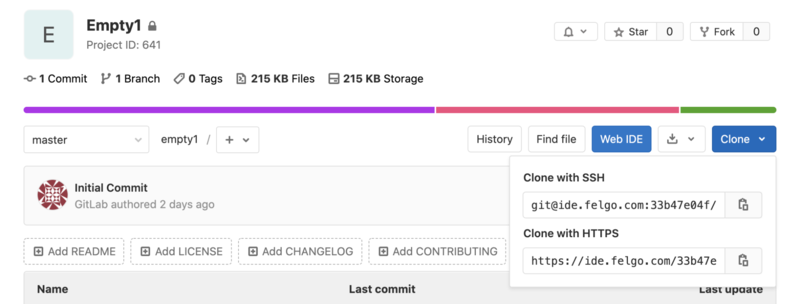
To clone with SSH, you first need to upload your SSH public key to your Cloud IDE SSH Keys settings page.
To clone with HTTPS, you can find (and change) the username on your Profile settings page and create an access token that needs to be used as password on your
Access Tokens setting page (with "write_repository" scope enabled).
Note: You can not use your Felgo login account for cloning with HTTPS.
- Use your favorite Git client on your PC and get a clone of your project
- Finally, open the project file in Qt Creator of your Felgo SDK installation and continue working on it.
That way your project is hosted on Felgo Cloud IDE and you can use both, the Cloud IDE and your local Felgo SDK installation for development.


