Integrate with Chartboost to monetize and cross-promote your games with ads.

Integrate with Chartboost to monetize and cross-promote your games with ads.
Chartboost is an ad network specifically designed for games and targeted at gamers. With Chartboost interstitial ads you can generate revenue for each click or install your games deliver, depending how other developers on the advertising side bid four your ad space.
Chartboost offers the so-called More Apps pages, on which you can either cross-promote your own games or games of other developers. This allows driving traffic from existing games to new ones.
The Chartboost plugin allows monetizing your apps & games by embedding ads from the Chartboost ad network or cross-promote other games of you or other developers.
Advertising campaigns can be used to earn revenue by showing ads, while cross-promotions make it simple to tell existing players about a new game.
Beside classic advertising and cross-promotion Chartboost also offers Rewarded videos, which are an ad type that give the player a reward (e.g. premium currency) after watching a mobile app trailer.
Chartboost is an ad network specifically designed for games and targeted at gamers. Therefore only ads for games (and not apps in general) are displayed. The available standard ad type in Chartboost are interstitial ads, which can be shown between game sessions or at startup.
With Chartboost interstitial ads you can generate revenue for each click or install your games deliver, depending how the developer on the advertising side bids.
To show an interstitial ad call Chartboost::showInterstitial() from within your code. For quicker load times, we recommend caching data prior to making this call with Chartboost::cacheInterstitial().
Additionally, Chartboost offers the so-called "More Apps" page, on which you can either cross-promote your own games or games of other developers. This allows driving traffic from existing games to new ones.
Chartboost allows a lot of different types of advertising campaigns like cross-promotion or direct deals. For detailed information on Chartboost settings consult the Chartboost documentation.
To show an "More Apps" page call Chartboost::showMoreApps() from within your code. For quicker load times, we recommend caching data prior to making this call with Chartboost::cacheMoreApps().
Named Locations allow you to show ads at different points within your game and fine-tune campaign behavior from the Chartboost dashboard without the need of updating your apps.
You can either define your own custom location names or use one of the predefined which matches your game's location best:
Chartboost.DefaultLocationChartboost.StartupLocationChartboost.HomeScreenLocationChartboost.MainMenuLocationChartboost.GameScreenLocationChartboost.AchievementsLocationChartboost.QuestsLocationChartboost.PauseLocationChartboost.LevelStartLocationChartboost.LevelCompleteLocationChartboost.TurnCompleteLocationChartboost.IAPStoreLocationChartboost.GItemStoreLocationChartboost.GameOverLocationChartboost.LeaderboardLocationChartboost.SettingsLocationChartboost.QuitLocationIf you omit a location parameter the default value Chartboost.DefaultLocation is used.
Note: Although it's possible to define own location identifiers it's recommended to use one of the predefined ones.
It's also recommended to have a maximum of 5-7 named locations per game.
To try the plugin or see an integration example have a look at the Felgo Plugin Demo app.
Please also have a look at our plugin example project on GitHub: https://github.com/FelgoSDK/PluginDemo.
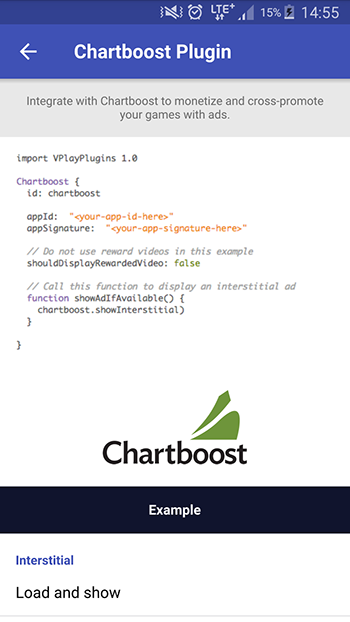
The Chartboost item can be used like any other QML item. Here is a simple example of how to integrate the plugin in your existing game to display interstitial ads, but not the More Apps page:
 import Felgo

 App{
   NavigationStack {
     AppPage {
       title: "Chartboost"

       Chartboost {
         id: chartboost

         appId:  "<your-app-id-here>"
         appSignature:  "<your-app-signature-here>"

         // Do not use reward videos in this example
         shouldDisplayRewardedVideo: false

         // Call this function to display an interstitial ad at the default location
         function showAdIfAvailable() {
           chartboost.showInterstitial()
         }

         onInterstitialCached: (location, locationType) => {
           console.debug("InterstitialCached at location:", location)
         }

         onInterstitialFailedToLoad: (location, error, locationType) => {
           console.debug("InterstitialFailedToLoad at location:", location, "error:", error)
         }

       }
     }
   }
 }
|
Item allows monetizing your games by embedding Chartboost ads on Android and iOS |
When you create a new project, you can choose to add example plugin integrations as well. Open Qt Creator and choose “File / New File or Project”, then choose Single-Page Application in the Felgo Apps section or any other wizard. For Felgo Games, you can also find an own Game with Plugins project template as an own wizard.
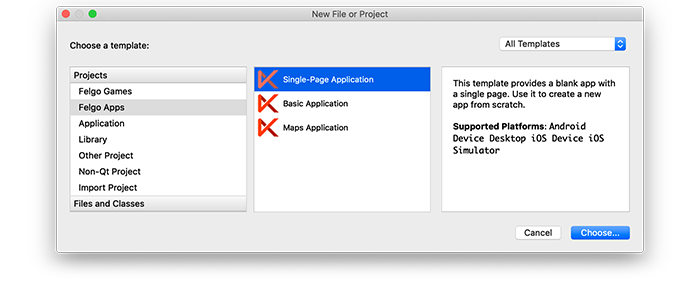
Then select the platforms you want to run your application on. The plugins are available for both iOS & Android. There is a fallback functionality in place on Desktop platforms so your project still works when you call methods of the plugins. This allows you to do the main development on your PC, and for testing the plugin functionality you can run the project on iOS and Android.
After the Kit Selection, you can choose which of the plugins you’d like to add to your project:
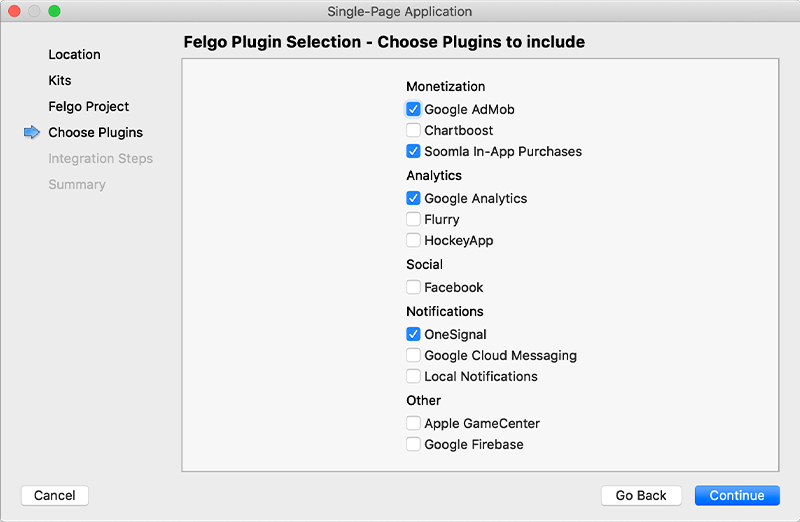
Then complete the wizard, your project is now set up with all the correct plugin dependencies for Android & iOS automatically. This includes:
.gradle file for Android..plist file for iOS.CMakeLists.txt file to include the plugin libraries for iOS.Note: Additional integration steps are still required for most plugins, for example to add the actual plugin libraries for iOS to your project. Please have a look at the integration steps described in the documentation for each of the used plugins.
If you have an existing Felgo application, follow these steps to include a plugin to your app or game:
In Qt Creator, select “File / New File or Project” and choose either Felgo Games or Felgo Apps from Files and Classes. Then select Felgo Plugin and press Choose.
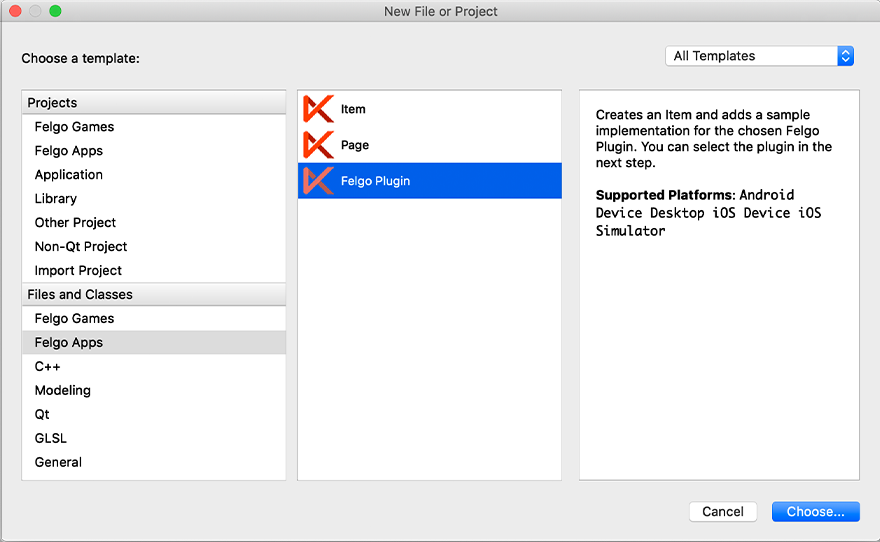
You can now select the plugin you want to add:
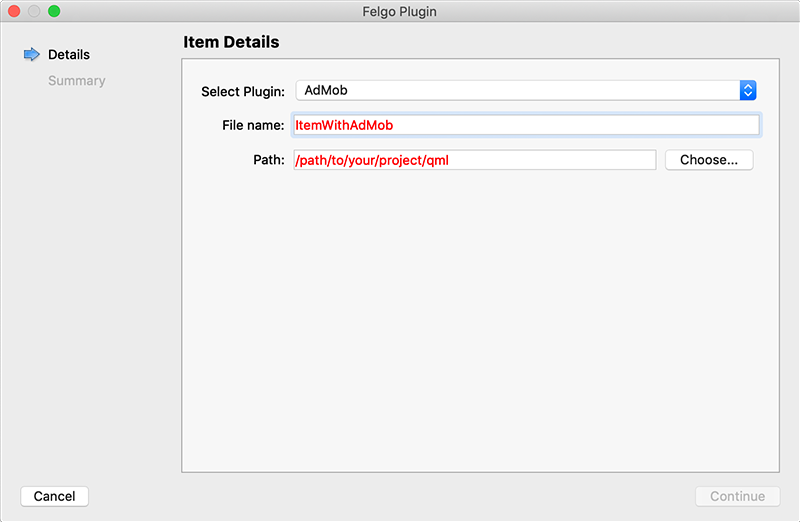
The plugin item, which contains the chosen plugin and a short usage example, is now added to your project. To use the item in your project, simply perform these steps:
main.qml file.CMakeLists.txt file & .plist file for iOS usage. See the iOS integration guide of the chosen plugin for more information..gradle file for Android usage. See the Android integration guide of the chosen plugin for more information.Note: If you have an existing Qt application, you can also add Felgo Plugins to your app! See here how to do this.
You can test all plugins as soon as the required integration steps and plugin configuration are completed.
However, the plugins are only available as Trial Versions if they are not activated with a valid license. When you are using unlicensed plugins, a dialog is shown and a watermark overlays your application to notify you about the testing state of the plugin.
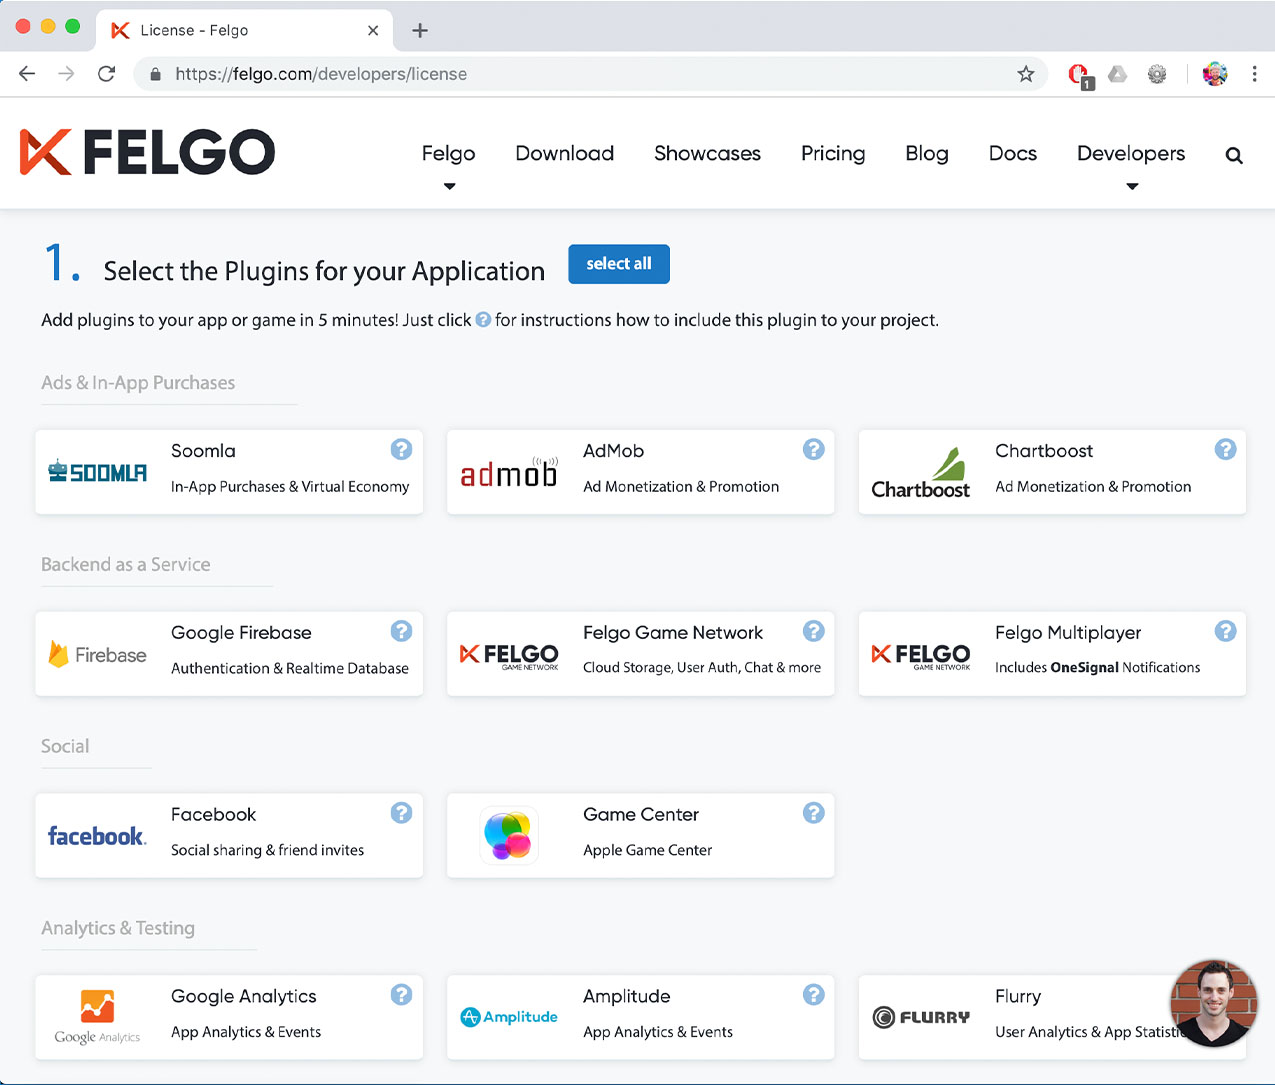
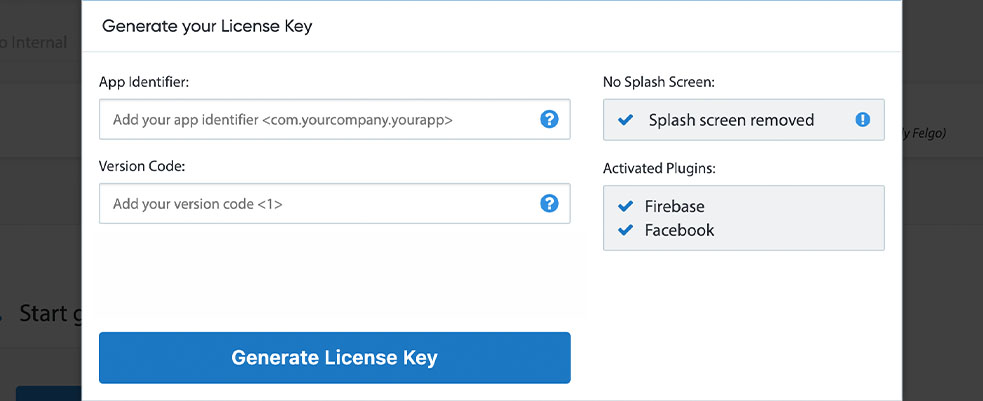
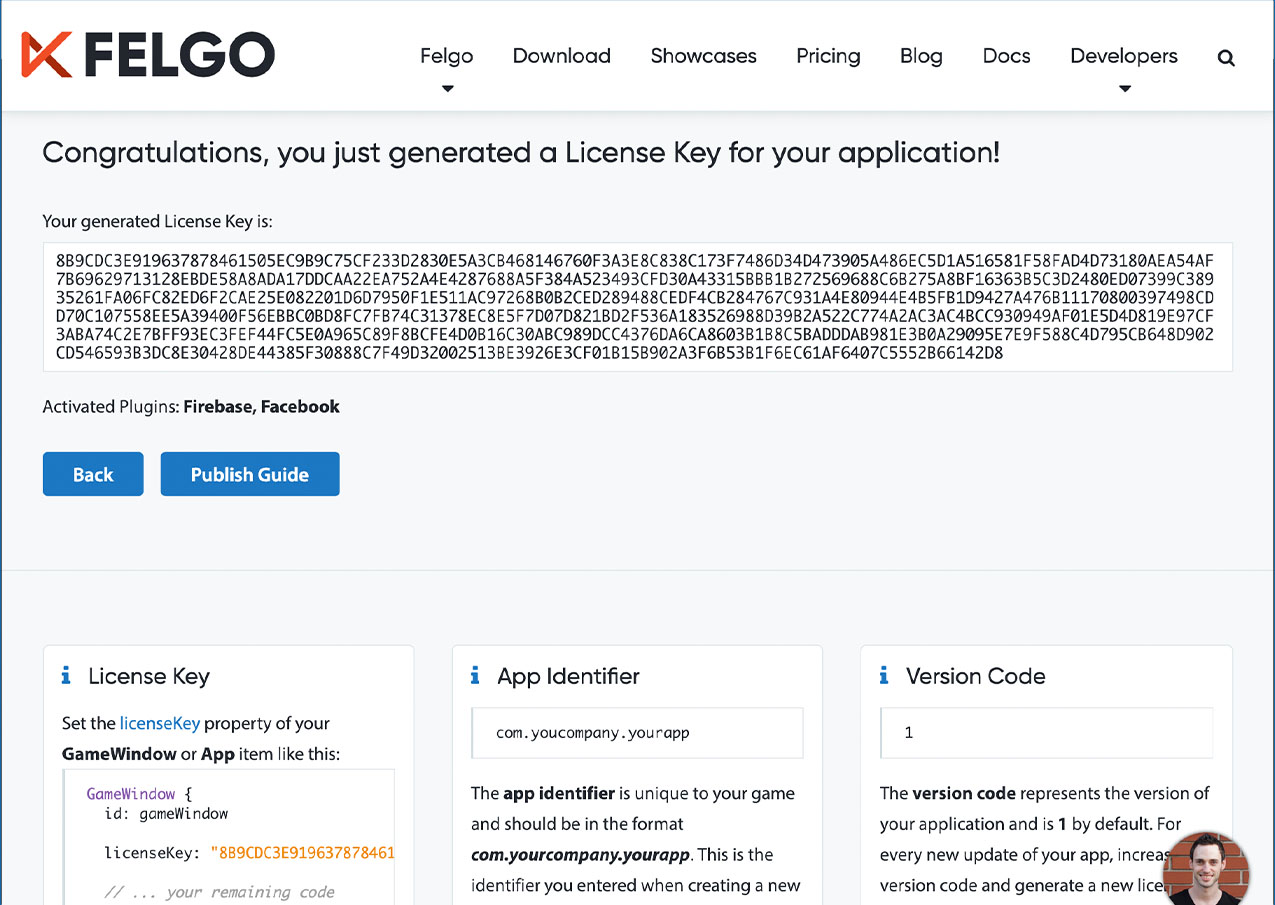
All monetization plugins are free to use in all licenses, other plugins are only fully usable if you have purchased the Startup or Business license. To activate plugins and enable their full functionality it is required to create a license key. You can create such a key for your application using the license creation page.
This is how it works:
To use the Chartboost plugin you need to add the platform-specific native libraries to your project, described here:
Add the following lines of code to your CMakeLists.txt file:
 set(FELGO_PLUGINS
    chartboost
 )
Note: Make sure to declare the FELGO_PLUGINS before calling felgo_configure_executable, which links the required Frameworks based on your settings.
Chartboost.framework from the ios sub-folder to a sub-folder called ios within your project directory.build.gradle file and add the following lines to the dependencies block:
 dependencies {
   implementation 'com.felgo.plugins:plugin-chartboost:4.+'
 }
Also, add the following repository to the allprojects -> repositories node:
maven { url 'https://cboost.jfrog.io/artifactory/chartboost-ads/' }
Note: If you did not create your project from any of our latest wizards, make sure that your project uses the Gradle Build System like described here.
You finally need to set up a Chartboost user account at https://www.chartboost.com. Then open your Chartboost dashboard (https://dashboard.chartboost.com) and add an app & a campaign for your game. If you're publishing your game for both iOS & Android you should add two apps (and campaigns), as links to other games are platform-specific.
Note: It can take up to an hour until your new campaigns are available on devices.
| iOS | 8.1.0 |
| Android | 8.4.3 |
Note: Other SDK versions higher than the stated ones might also be working but are not actively tested as of now.