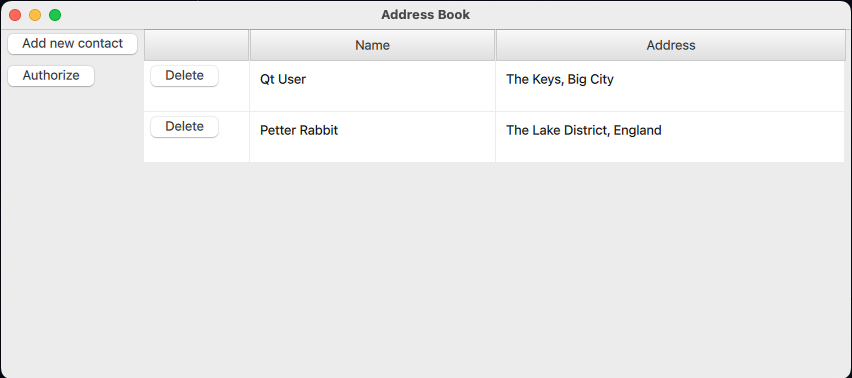
Example of how to create a RESTful API client.

This example shows how to create a basic QML application with address book functionality. The application uses RESTful communication with a given server to send requests and retrieve data.
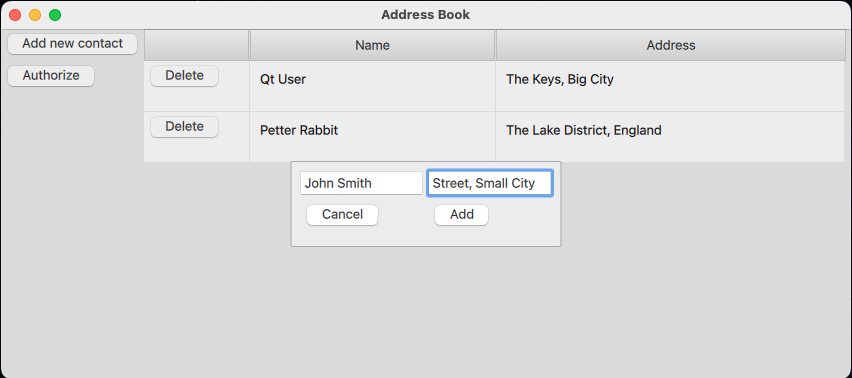
The application allows users to add new contacts by clicking the 'Add Contact' button and then entering the data for the record and clicking the 'Add' button (see image below).

The Address Book application gives you the ability to delete an entry, by clicking the 'Delete' button next to the entry, and update by updating the data in the table.
In order to use the modification features, users must authorize themselves by providing a key and value, which will be used in communication with the RESTful API.

To run the client application, first run the Address Book server example in the background or use an already running server that provides used API. Then run the client application, to run it host and port arguments must be provided, for example:
./addressbookclient --host http://127.0.0.1 --port 62122
This example application uses QNetworkAccessManager which is wrapped in the RestAccessManager class.
manager.connectToHost(host, port);
manager.setAutoDeleteReplies(true);
QObject::connect(&manager, &QNetworkAccessManager::finished, this,
                 &RestAccessManager::readContacts);
The code snippet above shows how to connect QNetworkAccessManager to this wrapper. First, a connection to the server is established and the QNetworkAccessManager::setAutoDeleteReplies method is called to simplify the QNetworkReply deletion. Then QObject::connect is used to call the internal RestAccessManager::readContacts after the QNetworkReply is ready to be processed.
void RestAccessManager::readContacts(QNetworkReply *reply)
{
    if (reply->error()) {
        return;
    }
    const std::optional<QJsonArray> array = byteArrayToJsonArray(reply->readAll());
    if (array) {
        ContactsMap tmpContacts;
        for (const auto &jsonValue : *array) {
            if (jsonValue.isObject()) {
                const QJsonObject obj = jsonValue.toObject();
                if (obj.contains("id") && obj.contains("name") && obj.contains("address")) {
                    tmpContacts.insert(obj.value("id").toInt(),
                                       ContactEntry{ obj.value("id").toInt(),
                                                     obj.value("name").toString(),
                                                     obj.value("address").toString() });
                }
            }
        }
        {
            QMutexLocker lock(&contactsMtx);
            contacts.swap(tmpContacts);
        }
        emit contactsChanged();
    } else {
        this->updateContacts();
    }
}
This method asynchronously processes each QNetworkReply for each request sent via QNetworkAccessManager. When the response is an array, that practically means that RestAccessManage got a new list of the contacts, so it has to update it. When the response is different, it means that the corresponding request has changed the list of contacts and it needs to be retrieved from the server.
void RestAccessManager::updateContacts()
{
    auto request = QNetworkRequest(QUrl(QString("%1:%2/v2/contact").arg(host).arg(port)));
    request.setHeader(QNetworkRequest::KnownHeaders::ContentTypeHeader, "application/json");
    manager.get(request);
}
To send a GET request, the QNetworkAccessManager::get method is used with the prepared QNetworkRequest. QNetworkRequest::setHeader is used to ensure correct encoding of the content.
void RestAccessManager::addContact(const ContactEntry &entry)
{
    auto request = QNetworkRequest(QUrl(QString("%1:%2/v2/contact").arg(host).arg(port)));
    request.setHeader(QNetworkRequest::KnownHeaders::ContentTypeHeader, "application/json");
    if (authHeader) {
        request.setRawHeader(authHeader->key.toLatin1(), authHeader->value.toLatin1());
    }
    manager.post(request, QJsonDocument(entry.toJson()).toJson(QJsonDocument::Compact));
}
To send the POST request, a similar approach can be used. In addition, to set the authorization header QNetworkRequest::setRawHeader was used.
See also RESTful server Address Book Example.

As part of the free Business evaluation, we offer a free welcome call for companies, to talk about your requirements, and how the Felgo SDK & Services can help you. Just sign up and schedule your call.
Sign up now to start your free Business evaluation:

