Felgo 4.0 is based on Qt 6.4.0 and brings many changes and new features. For a quick introduction to Felgo 4 and Qt 6, see the release blog post: Create Beautiful Cross-Platform Apps with Felgo 4 and Qt 6
To get Felgo 4, download the latest installer from the website. Felgo 3 is still available with a separate installer as well. You can install and use Felgo 4 side-by-side with a
different Qt or your existing Felgo 3 installation.
This document describes all relevant changes when switching from Felgo 3 and Qt 5 to Felgo 4 and Qt 6:
Felgo 4.0 Upgrade Guide
The switch from Felgo 3 and Qt 5 requires adaptions for existing Felgo projects to match various Qt and Felgo APIs that changed. This includes the recommended switch to the CMake build system, QML syntax and API changes, as
well as updates to the Android and iOS configuration of your project.
The sections below focus on the required migration changes for Felgo projects and APIs. However, there are many other changes in Qt 6 that might affect custom parts your Qt application For example, bearer management is
removed from Qt Network and the QNetworkConfiguration and QNetworkConfigurationManager classes no longer exist. Qt Multimedia is missing the QML Audio type, as you should now play audio files with a MediaPlayer and AudioOutput instead, and so on.
See the Qt documentation for a full list of Changes to Modules in Qt 6 and a Qt 6 Porting Guide.
Build System Update to CMake
For Qt 6 and Felgo 4, CMake is now the preferred build system. CMake offers various advantages over qmake. The Felgo 4.0 Release Post
explains the benefits and shows how a Felgo 4 CMake configuration looks like.

You can keep your qmake project configuration initially, but it is recommended to upgrade existing Felgo projects to the CMake build system. This is because some features, like multi-ABI builds on Android, are not supported
with qmake and Qt does not plan to further develop and improve qmake support.
The section Step 1: Switch to CMake describes the process in detail.
New Features & QML API Changes
The switch to Qt 6 affects some existing Felgo components that now have new features or a slightly different QML API.
This section covers all changes that affect existing Felgo projects:
Felgo Controls with Qt Quick Controls 2.0
All Felgo controls now use Qt Quick Controls 2.0. This brings some minor changes to their QML APIs.
- The components
Page, Icon and ScrollIndicator now use the Felgo App-prefix. This is because Qt Quick Controls 2.0 already contains a Page and ScrollIndicator type. Also there is a Icon type in Qt Location.
Thus the Felgo components are now called AppPage, AppIcon and AppScrollIndicator.
- Many default controls in Qt Quick Controls 2.0 now already have an icon property. In Felgo 3, this property was used to set a
Felgo IconType icon for many components.
To configure a Felgo AppIcon, you can now set the AppIcon::iconType property instead. The AbstractButton::icon is unused in the Felgo controls.
This change affects the following QML types: AppIcon, AppButton, AppCheckBox, AppActivityIndicator, ActivityIndicatorBarItem, FloatingActionButton, IconButton (also selectedIconType), IconButtonBarItem, NavigationItem, SearchBar, ThemeAppCheckBox. All these types now have an iconType property instead
of an icon property.
- The property
tabPressed of AppTabButton no longer exists. You can use the AbstractButton::pressed property from the new base type instead.
- The properties Navigation::tabPosition and TabControl::tabPosition have different enumeration values. The updated
controls are now based on the QQC2 TabBar.
They thus use the values TabBar.Header or TabBar.Footer instead of Qt.TopEdge and Qt.BottomEdge.
To update your code, switch existing items and property assignments like in this example:
import Felgo
import QtQuick
App {
Navigation {
navigationMode: navigationModeTabs
tabPosition: TabBar.Header
NavigationItem {
title: "Home"
iconType: IconType.home
AppPage {
Column {
anchors.centerIn: parent
AppButton {
text: "Click me"
iconType: IconType.handodown
}
AppCheckBox{
text: "Enabled?"
iconType: IconType.adjust
}
AppIcon {
iconType: IconType.gear
}
}
}
}
}
}
Games Components Changes
Felgo 4.1 includes the Games components again, migrated to Qt 6.
It includes the core gaming modules. A number of components are not yet migrated:
Fixed Name Clashes
Some Felgo Felgo Games components already exist in QtQuick modules. These are now renamed with the Game-prefix. This prevents accidentally using a
wrong type based on the order of your QML imports, or having to use import aliases.
The affected Felgo QML types and existing QtQuick types are:
QML API Changes
There are also number of API changes due to underlying changes in Qt 6:
- The property
GameSoundEffect.category no longer exists.
- The property
BackgroundMusic.availability no longer exists.
- The property
BackgroundMusic.autoLoad no longer exists. To delay loading the media file, set the BackgroundMusic::source property only before calling
BackgroundMusic::play().
To update your code, switch existing items and remove property assignments like in this example:
import Felgo
import QtQuick
GameWindow {
Scene {
BackgroundMusic {
source: Qt.resolvedUrl("music.mp3")
}
GameSoundEffect {
source: Qt.resolvedUrl("ding.wav")
}
GameAnimatedSprite {
frameWidth: 32
frameHeight: 32
frameCount: 4
startFrameColumn: 2
frameRate: 20
source: Qt.resolvedUrl("squafurY.png")
}
GameSpriteSequence {
GameSprite {
frameCount:4
frameWidth: 32
frameHeight: 32
frameRate: 20
source: Qt.resolvedUrl("squaby-sprite-walking.png")
}
}
}
}
Lazy Loading of NavigationItems
NavigationItem shows the content of your app's Navigation. In Felgo 3, it always lazy-loads its content. Thus the content is only loaded when the
navigation item is selected.
This behavior is now optional. You can manually set NavigationItem::lazyLoadContent to false and always load content on startup.
This example demonstrates how to load all NavigationItems on startup:
import Felgo
import QtQuick
App {
Navigation {
NavigationItem {
title: "Home"
iconType: IconType.home
lazyLoadContent: false
AppPage {
}
}
NavigationItem {
title: "Settings"
iconType: IconType.gear
lazyLoadContent: false
AppPage {
Component.onCompleted: console.log("This is loaded on startup because lazy loading is disabled.")
}
}
}
}
Context Properties are Singletons
NativeUtils and FileUtils are now available as singleton objects instead of context properties.
You can use them directly with their uppercase class names NativeUtils and FileUtils. The lowercase context properties nativeUtils and fileUtils are still available for
backwards compatibility with Felgo 3.
This improves code consistency, because enumerations like NativeUtils.SoftInputMode were already available with the upper-case name. For example, use this code to switch your app's NativeUtils::softInputMode:
import Felgo
import QtQuick
import QtQuick.Controls
App {
onInitTheme: {
NativeUtils.softInputMode = NativeUtils.SoftInputModeAdjustPan
}
}
Qt Location and Maps with MapLibre GL
Qt 6 currently does not support the Qt Location module. This includes displaying maps with Map and
AppMap.
However Felgo 4 includes that functionality. Thus if your app currently uses AppMap you can upgrade it to Felgo 4 too.
The only change is that displaying vector maps with the Mapbox GL Plugin is not available at the moment. However you can easily replace it with the new
Maplibre GL Plugin. This uses Maplibre GL Native as an alternative to Mapbox GL.
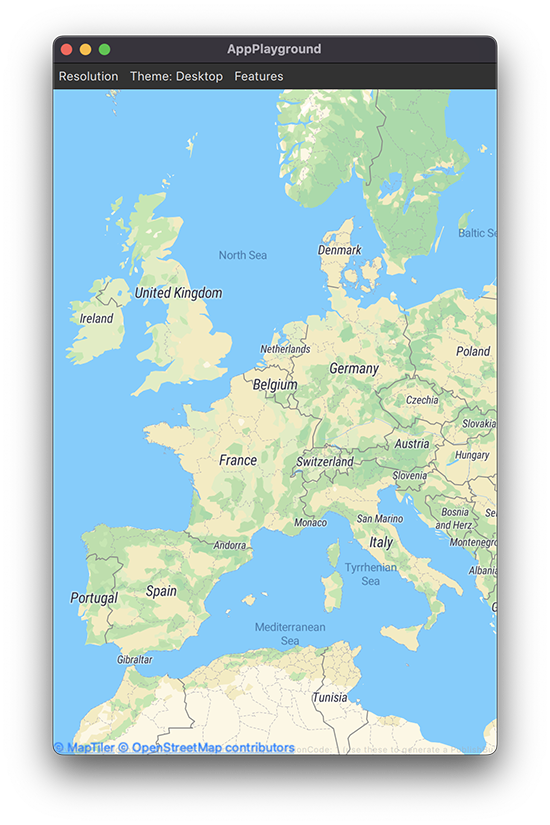
To do so, update the plugin name from "mapboxgl" to "maplibregl". The new plugin provides a different set of plugin parameters. Those are documented at the Maplibre GL Plugin documentation.
You can define the map style via a JSON style file. Set a PluginParameter with a name of "maplibregl.mapping.additional_style_urls". Use
a value of an URL to such a style description. See the official Maplibre Style Specification for more details.
Note: MapLibre GL relies on OpenGL, and thus only works when enforcing OpenGL rendering. Add this code in your main.cpp, before creating QApplication (see also: Rendering Changes: Hardware Interface):
QQuickWindow::setGraphicsApi(QSGRendererInterface::OpenGLRhi);
The following example app uses the Maplibre GL Plugin and a simple configuration:
import Felgo
import QtLocation
App {
Plugin {
id: myMapPlugin
name: "maplibregl"
parameters: [
PluginParameter {
name: "maplibregl.mapping.additional_style_urls"
value: "https://demotiles.maplibre.org/style.json"
}
]
}
NavigationStack {
AppPage {
title: "Map Example"
AppMap {
anchors.fill: parent
plugin: myMapPlugin
}
}
}
}
Note: The other Qt Location Plugins, including MapBox
tile maps, are still supported. No changes are required in projects using those.
Functional Differences
The behavior of some Felgo components is different when updating to Felgo 4. This is due to changed features in the underlying Qt modules. Below is a full list of components that work differently now:
With Qt 6, ApplicationWindow now uses a custom-rendered menuBar on desktop platforms. This change also affects the Felgo components App and GameWindow.
If you are not using any custom menu, this change only affects the Felgo menu that is present for debug builds on Desktop. The debug menu for simulating different resolutions and platform themes now has a changed
look-and-feel.
Projects that customize the ApplicationWindow::menuBar also use the new custom-rendered menu of Qt 6 now.
Rendering Changes: Hardware Interface
Qt 6 introduces a hardware abstraction layer for rendering. This allows to support different graphics APIs and avoids hard dependencies on OpenGL. The new flexible rendering system is called QRhi or Qt Rendering Hardware Interface.
However, some features are only supported with the OpenGL rendering system. These include:
For such use-cases, Qt allows to configure the desired graphics API. To do so, add this call before initializing your QApplication:
#include <QQuickWindow>
int main(int argc, char *argv[])
{
QQuickWindow::setGraphicsApi(QSGRendererInterface::OpenGLRhi);
QApplication app(argc, argv);
…
}
All platforms support OpenGL but it might be slower than newer APIs like Vulkan, Metal or Direct3D.
Detecting the Online State
The properties App::isOnline and GameWindowApplicationWindow::isOnline are now only supported on Android and
iOS. On other platforms, they will always return true. While developing your mobile app on Desktop, you can also simulate the value with the Felgo debug menu bar.

This is because Qt 6 removed network state access through QNetworkConfigurationManager.
On mobile platforms, the property now uses native APIs for accessing the network state instead. You can also use HttpRequest to find out if your device has an active internet connection.
For example, you could send a request to a known server with and check if it responds or times out.
Theme Initialization
In Felgo 4, your App::initTheme handler is now called after the App object is completed. This is due to a change in how Qt 6 initializes QML
objects compared to Qt 5.
The App window is only visible after the onInitTheme() handler has completed, thus generally this change has no effect on existing apps.
However, if you use any Animation or Behavior that trigger on changed Theme properties, those animations might play during app startup. This is because your changes are applied when the app and all its objects already exist.
To prevent this, you can use the new Theme::isInitialized property. It is only set to true after the onInitTheme() handler has finished
executing.
For example, only enable Behavior after the theme is initialized:
import Felgo
import QtQuick
App {
onInitTheme: {
Theme.colors.backgroundColor = "black"
}
Rectangle {
anchors.fill: parent
color: Theme.backgroundColor
Behavior on color {
enabled: Theme.isInitialized
ColorAnimation { duration: 150; easing.type: Easing.InOutQuad }
}
}
}
NavigationStack Anchoring
NavigationStack has slightly changed default behavior regarding its layout. In Felgo 3, it anchors to its parent's top and bottom per default. In Felgo 4, this was removed. This way,
NavigationStack can also be used inside a Layout. For example, the default StackLayout of TabControl and Navigation.
Instead, it now just binds its height to its parent's height per default. In most cases, this does not change an app's behavior. However, if you add one of either top or bottom anchor, the NavigationStack might now be too high. To fix it, simply add the other anchor line too.
For example, if you have UI elements like a footer bar outside of NavigationStack:
import QtQuick
import Felgo
App {
NavigationStack {
anchors.top: parent.top
anchors.bottom: footer.top
AppPage {
title: "Main Page"
}
}
Rectangle {
id: footer
width: parent.width
height: testText.height
anchors.bottom: parent.bottom
color: Theme.secondaryBackgroundColor
AppButton {
id: testText
anchors.centerIn: parent
text: "Footer"
}
}
}
The Felgo application does no longer apply a custom font by default. You can thus remove the setting from the main.cpp:
felgo.setPreservePlatformFonts(true);
Changes to Qt Quick and QML Syntax
Version-less Qt Quick Imports
QML no longer requires to specify versions for Import Statements. You can completely omit the version, or specify just the major version to import.
This allows better code maintainability by always using the latest version except if explicitly stated.
Furthermore, all Qt Quick modules now use versions that match the current Qt version. For example, the version of QtQuick is currently 6.4 instead of 2.2.
In most cases you can completely remove versions from imports. If you rely on some API or functionality that is different in a later version, use explicit imports.
import Felgo
import QtQuick
import Qt.labs.settings 1
import MyCustomModule 2.5
App {
}
Named Handler Function Parameters
Signal handlers use a slightly updated syntax in Qt 6. It is now deprecated to add a simple code block and implicitly access parameters by
their defined names. Instead, give explicit names to parameters for signal handlers.
To do so, add a JavaScript function with named parameters instead of a simple code block. This allows you to use any name for the parameters, instead of the same as in the signal definition.
You can use a regular function(), or a lambda expression:
import Felgo
App {
onClosing: close => close.accepted = false
onSceneGraphError: function(error, message) {
console.log("Scene graph error occurred:", error, message)
}
}
The Connections QML type also uses a new syntax. It is now deprecated to add signal handlers with the direct property syntax. This affects both handlers with
and without parameters.
Instead, define a Javascript function() with the signal handler name:
 import Felgo

 App {
   Connections {
     target: NativeUtils

     function onScreenOrientationChanged() {
       console.log("Screen orientation is now:", NativeUtils.screenOrientation)
     }
   }
 }
High-Dpi Mode as Default
In Qt 5, High DPI scaling was an optional application configuration. You used to enable it from C++ via the Qt::AA_DisableHighDpiScaling attribute.
QCoreApplication::setAttribute(Qt::AA_DisableHighDpiScaling);
In Qt 6, the high DPI mode is always enabled. Thus that attribute no longer exists and you can remove the code to enable it.
High DPI scaling adds a scale factor between logical and physical pixels. Thus 1 pixel in QML might not correspond to 1 physical pixel on the device screen.
You can always access the current scale factor with Screen.devicePixelRatio.
Note: It is still recommended to use the App::dp() and App::sp() functions to set sizes in QML. This allows additional scaling for
content, for example system text scaling on mobile devices.
Qt Graphical Effects Compatibility Module
The QML QtGraphicalEffects module is now an additional module.
It is available via import Qt5Compat.GraphicalEffects.
This is a direct result of the Rendering Changes: Hardware Interface. The graphical effects were updated to be independent
of the current rendering API.
Currently it supports 17 out of the 25 graphical effects that were available in Qt 5. The unsupported effects are deleted: Blend, DirectionalBlur, GaussianBlur,
InnerShadow, MaskedBlur, RadialBlur, RecursiveBlur and ZoomBlur.
Many effects offered a samples property to define the algorithm's level of detail. This is also currently unavailable in the ported effects.
For most apps, you can simply update the import statement and remove the samples property:
import Felgo
import Qt5Compat.GraphicalEffects
App {
AppIcon {
id: icon
iconType: IconType.home
visible: false
size: sp(100)
}
FastBlur {
anchors.fill: icon
source: icon
radius: icon.size * 0.1
}
}
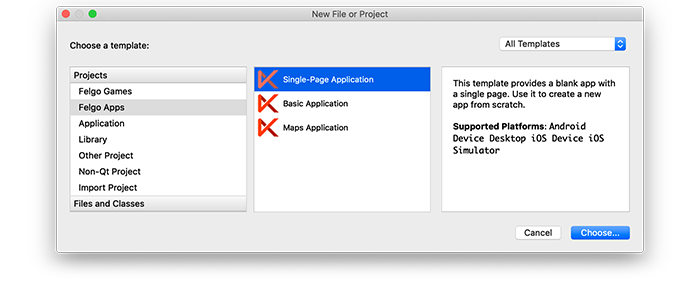
How to Migrate Your Felgo 3 Project
If you have an existing Felgo 3 project, there are different ways to migrate to Felgo 4:
Use a Felgo 4 Project as Reference
If you haven't made any significant changes to the basic Felgo project setup, this simple option is for you.
Create a new Felgo 4 project with Qt Creator. You can do so by selecting File -> New Project. Then just create an empty "Single-Page Application".
To simplify migration, enter the project name and identifier of your existing project in the following dialogs.
Then copy and overwrite the relevant project files into your existing project:
CMakeLists.txtmain.cpp-
android folder:
AndroidManifest.xmlbuild.gradleres folder (but keep your app icon in drawable-*dpi)
-
ios folder:
Project-Info.plistLaunch Screen.storyboardAssets.xcassets (but keep your app icon in AppIcon.appiconset)
Note: When copying those files, make sure to migrate custom code and settings from your own project. This includes the app identifier, version code, version name, license key, and any additional advanced
configurations.
Then remove the files that have no use anymore:
- Your qmake
*.pro file (replaced by CMakeLists.txt)
resources.qrc - CMake now auto-generates this in the build folder via qt_add_qml_module()-
android folder:
gradlewgradle folder - CMake now automatically copies this from the Felgo installation.
Your project is now configured for Qt 6 and Felgo 4.
As the last step, review the source code and apply necessary code changes as described in the full migration guide: Step 3:
Migrate Source Code and APIs
Follow the Step-by-Step Guide
If you have a complex project, you can apply all individual migration steps for Qt 6 manually. Use the step-by-step guide below to go through all the required changes:
Note: The migration guide only covers relevant additions and changes to build and run Qt 6 projects and correctly use the Felgo APIs. To migrate project-specific features, see the Qt documentation for a full list of Changes to Qt Modules in Qt 6.
Get Migration Support from Felgo
Apart from the migration steps for Felgo projects, Qt 6 brings many more changes that might affect your application if it uses certain Qt modules and features.
Felgo can help to migrate your Qt 5 project and get you started with Qt 6 & Felgo 4. If you encounter any problems or want to take advantage of Felgo's expertise, please get in
touch.
Step-by-step Guide for Migrating Felgo 3 Projects
Step 1: Switch to CMake
When using CMake the project setup is done with a CMakeLists.txt file instead of a .pro qmake configuration file. The Qt Creator IDE supports both project types.
Apart from the project file, the existing project structure can stay exactly the same. This makes it easy to migrate an existing qmake project to CMake:
Add a CMakeLists Configuration
Create a CMakeLists.txt file in your root project folder, next to the existing .pro file. After it is set up, open it instead of the .pro file in Qt Creator.
If you did not change the basic qmake configuration too much, you can also Use a Felgo 4 Project as Reference to copy the
CMake configuration. This also applies for the Android and iOS settings described in Step 2: Update the Native
Configuration.
To start with a fresh configuration, create a new CMakeLists.txt that is structured like this:
cmake_minimum_required(VERSION 3.16)
project(MyProjectName VERSION 0.1 LANGUAGES CXX)
set(CMAKE_AUTOMOC ON)
set(CMAKE_CXX_STANDARD_REQUIRED ON)
find_package(Felgo REQUIRED)
set(PRODUCT_IDENTIFIER "com.felgo.Qt6App")
set(PRODUCT_VERSION_NAME "1.0.0")
set(PRODUCT_VERSION_CODE 1)
set(PRODUCT_LICENSE_KEY "")
# Find all QML/JS files for the QML compiler:
file(GLOB_RECURSE QmlFiles RELATIVE ${CMAKE_CURRENT_SOURCE_DIR} qml
Customize the Project Settings
The CMakeLists.txt file defines your project configuration Similar to the Felgo qmake configuration, various options for customization are available.
First, you can configure app identifier, version name and code:
 # Project identifier and version
 set(PRODUCT_IDENTIFIER "com.felgo.Qt6App")
 set(PRODUCT_VERSION_NAME "1.0.0")
 set(PRODUCT_VERSION_CODE 1)
You can also configure the Felgo license key and define the Felgo Plugins you want to integrate and use:
 # Optionally set a license key that is used instead of the key from main.qml
 set(PRODUCT_LICENSE_KEY "")

 set(FELGO_PLUGINS
    amplitude
    firebase
 )
Another feature of Felgo 3 qmake projects is the usage of DEPLOYMENTFOLDERS. It copies and bundles raw QML sources or assets with the application instead of compiling them with the Qt Resource System (QRC). This
is meaningful to speed up and simplify the build process during development.
The CMake variant no longer uses an additional variable for the folders and instead directly scans and includes the contents of the qml or assets directory in your Felgo project:
# Find all QML/JS files for the QML compiler:
file(GLOB_RECURSE QmlFiles RELATIVE ${CMAKE_CURRENT_SOURCE_DIR} qml
Note: The qt_add_executable() call adds all sources for your project - both QML and C++. Thus if you use custom C++ code, add all *.cpp files here too. You can also use the
file(GLOB_RECURSE ...) function to automatically find all C++ files:
file(GLOB_RECURSE SrcFolder RELATIVE ${CMAKE_CURRENT_SOURCE_DIR} src
To use the resource system, comment the deploy_resources command and add the folders to the QML module configuration:
 qt_add_qml_module(appMyProjectName
    URI MyProjectName
    VERSION 1.0
    QML_FILES ${QmlFiles}
    RESOURCES ${AssetsFiles}
    NO_RESOURCE_TARGET_PATH
 )
Use the resource system approach instead of the deploy_resources command for building release versions that you publish.
Lastly, add Felgo as a dependency on top of the build file:
find_package(Felgo REQUIRED)
And link it to your app on the bottom:
target_link_libraries(appMyProjectName PRIVATE Felgo)
All of the Felgo project wizards and demos are already updated to use a CMake configuration instead of qmake. You can find the full source code of all Felgo demos and
examples on GitHub.
Migrate Translations
CMake projects for Qt 6 and Felgo 4 operate differently when it comes to translations:
- Translations are placed in an own folder, side-by-side to the
qml and assets folder.
- You only require
*.ts files in your project. The released *.qm files are no longer needed.
- Translations are updated, compiled and linked with the application binary when you build the project.
- You can choose to udpate or release translations by activating the respective targets in the project build settings.
- The old way of manually updating or releasing translations by calling the tools from the Qt Creator menu is no longer supported.
This is how an example translation configuration with CMake looks like:
 # Add a .ts file for every language your app supports:
 set(TsFiles i18n/de_DE.ts i18n/de_AT.ts i18n/en_EN.ts i18n/cn_CN.ts i18n/fr_FR.ts)

 qt_add_executable(appTranslation
     main.cpp
     ${QmlFiles}
     ${AssetsFiles}
     ${TsFiles} # also show the .ts files in Qt Creator
 )

 # Register the .ts files and create Cmake lupdate/lrelease targets:
 find_package(Qt6 COMPONENTS Linguist REQUIRED)
 qt_add_translations(appTranslation TS_FILES ${TsFiles})
Note: Make sure to fix the paths in your translation files if you move them to a new folder side-by-side to the qml folder. You can activate the lupdate target and let the tool do the matching, but results may be
cleaner if you quickly search and replace the paths in the files manually.
For a more detailed introduction how to support multiple languages and translations in your CMake project, see the guide Internationalization with Felgo. You can also use the Translation Example demo project as a reference to see how it works.
Step 2: Update the Native Configuration
Due to the upgrade to Qt 6, some changes are required to the native project settings for iOS and Android:
Android Migration Steps
To prepare your Android build toolchain for Qt 6 and Felgo 4, please make sure to install and configure the Android JDK, SDK and NDK versions that are currently recommended in the Android Deployment Guide.
In addition, several changes are required to your project files in the android folder:
-
AndroidManifest.xml:
- Update class names from
net.vplay.VPlayApplication and net.vplay.VPlayActivity to com.felgo.helper.FelgoApplication and com.felgo.helper.FelgoActivity.
- Add attributes to
<application> tag:
 android:allowNativeHeapPointerTagging="false"
 android:extractNativeLibs="true"
- Add the
android:exported="true" attribute to <activity> tag
Note: For advanced use cases: Also add it to any other existing activities, services and receivers that should be accessible from other apps.
- Remove all the
<meta-data> tags under <activity>and only add these:
 <!-- Qt internal meta data -->
 <meta-data android:name="android.app.lib_name" android:value="-- %%INSERT_APP_LIB_NAME%% --"/>
 <meta-data android:name="android.app.arguments" android:value="-- %%INSERT_APP_ARGUMENTS%% --"/>
 <meta-data android:name="android.app.extract_android_style" android:value="minimal"/>
Example manifest:
 <?xml version='1.0' encoding='utf-8'?>
 <manifest package="com.felgo.Qt6App" xmlns:android="http://schemas.android.com/apk/res/android" android:versionName="1.0" android:versionCode="1" android:installLocation="auto">
     <application android:allowNativeHeapPointerTagging="false"
                  android:hardwareAccelerated="true"
                  android:extractNativeLibs="true"
                  android:name="com.felgo.helper.FelgoApplication"
                  android:label="-- %%INSERT_APP_NAME%% --"
                  android:icon="@drawable/ic_launcher"
                  android:theme="@android:style/Theme.NoTitleBar.Fullscreen">

         <activity android:configChanges="orientation|uiMode|screenLayout|screenSize|smallestScreenSize|layoutDirection|locale|fontScale|keyboard|keyboardHidden|navigation"
                   android:name="com.felgo.helper.FelgoActivity"
                   android:exported="true"
                   android:launchMode="singleTop"
                   android:label="-- %%INSERT_APP_NAME%% --"
                   android:screenOrientation="sensor">

             <intent-filter>
                 <action android:name="android.intent.action.MAIN"/>
                 <category android:name="android.intent.category.LAUNCHER"/>
             </intent-filter>

             <!-- Qt internal meta data -->
             <meta-data android:name="android.app.lib_name" android:value="-- %%INSERT_APP_LIB_NAME%% --"/>
             <meta-data android:name="android.app.arguments" android:value="-- %%INSERT_APP_ARGUMENTS%% --"/>
             <meta-data android:name="android.app.extract_android_style" android:value="minimal"/>
         </activity>

         <!-- file provider needed for letting external apps (like camera) write to a file of the app -->
         <provider
             android:name="androidx.core.content.FileProvider"
             android:authorities="${applicationId}.fileprovider"
             android:exported="false"
             android:grantUriPermissions="true">

             <meta-data
                 android:name="android.support.FILE_PROVIDER_PATHS"
                 android:resource="@xml/file_paths"/>
         </provider>

     </application>

     <supports-screens android:largeScreens="true" android:normalScreens="true" android:anyDensity="true" android:smallScreens="true"/>
     <!-- %%INSERT_PERMISSIONS -->
     <!-- %%INSERT_FEATURES -->
 </manifest>
-
build.gradle
- Update the build system version to a new dynamic default version:
classpath "com.android.tools.build:gradle:${androidGradleToolsVersion}"
- Update all plugin dependencies to Felgo 4, e.g.
net.vplay.plugins:plugin-admob:3.+' → com.felgo.plugins:plugin-admob:4.+'
- Remove this block under
defaultConfig{}:
 int qtVersionNr = project.hasProperty("qtVersionInt") ? qtVersionInt.toInteger() : 5132

 if (qtVersionNr < 5140) {
     resValue('array', 'load_local_libs', "")
 } else if (qtVersionNr >= 5140) {
     resValue('array', 'bundled_in_lib', "")
     resValue('array', 'bundled_in_assets', "")
 }
- If you use the Wikitude Plugin: Update the
ndk.abiFilters block. Using multi-ABI builds with Cmake splits them with semicolons instead of spaces in
gradle.properties. Thus update the split() command:
 ndk {
   abiFilters = targetArchitecture.split(' |;').collect{it as String}
 }
Example file:
buildscript {
repositories {
google()
mavenCentral()
}
dependencies {
classpath "com.android.tools.build:gradle:${androidGradleToolsVersion}"
}
}
allprojects {
repositories {
google()
mavenCentral()
maven { url 'https://install.felgo.com/maven/' }
}
}
apply plugin: 'com.android.application'
dependencies {
implementation fileTree(dir: 'libs', include: ['*.jar'])
implementation "androidx.appcompat:appcompat:1.2.0"
implementation 'com.felgo.plugins:plugin-amplitude:4+'
implementation 'com.felgo.plugins:plugin-wikitude:4+'
}
android {
namespace androidPackageName
compileSdkVersion androidCompileSdkVersion.toInteger()
buildToolsVersion androidBuildToolsVersion
compileOptions {
sourceCompatibility 1.8
targetCompatibility 1.8
}
defaultConfig {
multiDexEnabled true
targetSdkVersion androidCompileSdkVersion.toInteger()
applicationId = productIdentifier
versionCode = productVersionCode.toInteger()
versionName = productVersionName
minSdkVersion = project.hasProperty("qtMinSdkVersion") ? qtMinSdkVersion.toInteger() : 23
ndk {
abiFilters = targetArchitecture.split(' |;').collect{it as String}
}
}
sourceSets {
main {
manifest.srcFile 'AndroidManifest.xml'
java.srcDirs = [qt5AndroidDir + '/src', 'src', 'java']
aidl.srcDirs = [qt5AndroidDir + '/src', 'src', 'aidl']
res.srcDirs = [qt5AndroidDir + '/res', 'res']
resources.srcDirs = ['src']
renderscript.srcDirs = ['src']
assets.srcDirs = ['assets']
jniLibs.srcDirs = ['libs']
}
}
lintOptions {
abortOnError false
}
aaptOptions {
noCompress 'rcc'
}
tasks.withType(JavaCompile) {
options.incremental = true
}
}
iOS Migration Steps
Several changes are required to files in the ios folder:
-
Project-Info.plist
- Change variables in curly braces to normal parentheses, e.g. from:
 <key>CFBundleExecutable</key>
 <string>${EXECUTABLE_NAME}</string>
To:
 <key>CFBundleExecutable</key>
 <string>$(EXECUTABLE_NAME)</string>
The same applies to other variables like the PRODUCT_NAME, PRODUCT_VERSION_NAME, and PRODUCT_VERSION_CODE.
- Add the
UILaunchStoryboardName if it is not already present:
 <key>UILaunchStoryboardName</key>
 <string>Launch Screen</string>
Note: This will already be present for projects created with a version after Felgo 3.6.0.
Example file:
 <?xml version="1.0" encoding="UTF-8"?>
 <!DOCTYPE plist PUBLIC "-//Apple//DTD PLIST 1.0//EN" "http://www.apple.com/DTDs/PropertyList-1.0.dtd">
 <plist version="1.0">
 <dict>
     <key>CFBundleDisplayName</key>
     <string>DisplayName</string>
     <key>CFBundleExecutable</key>
     <string>$(EXECUTABLE_NAME)</string>
     <key>CFBundleIdentifier</key>
     <string>$(PRODUCT_BUNDLE_IDENTIFIER)</string>
     <key>CFBundleName</key>
     <string>$(PRODUCT_NAME)</string>
     <key>CFBundlePackageType</key>
     <string>APPL</string>
     <key>CFBundleShortVersionString</key>
     <string>$(PRODUCT_VERSION_NAME)</string>
     <key>CFBundleSignature</key>
     <string>????</string>
     <key>CFBundleVersion</key>
     <string>$(PRODUCT_VERSION_CODE)</string>
     <key>UIStatusBarHidden</key>
     <true/>
     <key>LSRequiresIPhoneOS</key>
     <true/>
     <key>UIViewControllerBasedStatusBarAppearance</key>
     <false/>
     <key>CFBundleAllowMixedLocalizations</key>
     <true/>
     <key>UIRequiresFullScreen</key>
     <true/>
     <key>UILaunchStoryboardName</key>
     <string>Launch Screen</string>
     <key>UISupportedInterfaceOrientations</key>
     <array>
         <string>UIInterfaceOrientationPortrait</string>
     </array>
     <key>UISupportedInterfaceOrientations~ipad</key>
     <array>
         <string>UIInterfaceOrientationPortrait</string>
         <string>UIInterfaceOrientationPortraitUpsideDown</string>
     </array>
     <key>NSPhotoLibraryUsageDescription</key>
     <string>App would like to access the library.</string>
     <key>NSPhotoLibraryAddUsageDescription</key>
     <string>App would like to save images taken with camera.</string>
     <key>NSCameraUsageDescription</key>
     <string>App would like to access the camera.</string>
     <key>NSBluetoothPeripheralUsageDescription</key>
     <string>App would like to access Bluetooth.</string>
     <key>NSBluetoothAlwaysUsageDescription</key>
     <string>App would like to access Bluetooth.</string>
     <key>NSContactsUsageDescription</key>
     <string>App would like to read contacts from the Addressbook.</string>
 </dict>
 </plist>
-
Launch Screen.storyboard - create a new file if it does not exist. Add the following content:
 <?xml version="1.0" encoding="UTF-8"?>
 <document type="com.apple.InterfaceBuilder3.CocoaTouch.Storyboard.XIB" version="3.0" toolsVersion="16096" targetRuntime="iOS.CocoaTouch" propertyAccessControl="none" useAutolayout="YES" launchScreen="YES" useTraitCollections="YES" useSafeAreas="YES" colorMatched="YES" initialViewController="01J-lp-oVM">
     <device id="retina6_1" orientation="portrait" appearance="light"/>
     <dependencies>
         <deployment identifier="iOS"/>
         <plugIn identifier="com.apple.InterfaceBuilder.IBCocoaTouchPlugin" version="16087"/>
         <capability name="Safe area layout guides" minToolsVersion="9.0"/>
         <capability name="documents saved in the Xcode 8 format" minToolsVersion="8.0"/>
     </dependencies>
     <scenes>
         <!--View Controller-->
         <scene sceneID="EHf-IW-A2E">
             <objects>
                 <viewController id="01J-lp-oVM" sceneMemberID="viewController">
                     <view key="view" contentMode="scaleToFill" id="Ze5-6b-2t3">
                         <rect key="frame" x="0.0" y="0.0" width="414" height="896"/>
                         <autoresizingMask key="autoresizingMask" widthSizable="YES" heightSizable="YES"/>
                         <color key="backgroundColor" red="1" green="1" blue="1" alpha="1" colorSpace="custom" customColorSpace="sRGB"/>
                         <viewLayoutGuide key="safeArea" id="Bcu-3y-fUS"/>
                     </view>
                 </viewController>
                 <placeholder placeholderIdentifier="IBFirstResponder" id="iYj-Kq-Ea1" userLabel="First Responder" sceneMemberID="firstResponder"/>
             </objects>
             <point key="canvasLocation" x="53" y="375"/>
         </scene>
     </scenes>
 </document>
Note: This is will already be present for projects created with a version after Felgo 3.6.0.
Step 3: Migrate Source Code and APIs
Apart from the CMake configuration and platform-specific settings, the source code is not yet ready to run. The application can already compile, but various errors will arise from changed Qt & Felgo QML APIs.
On the C++ side, Felgo only requires a small change in the main.cpp. Please change engine initialization to load the QML file via a QUrl. Otherwise, Qt may fail
to resolve the path on certain platforms:
engine.load(QUrl(felgo.mainQmlFileName()));
For details on the migration of your QML code, please consider the changes listed in the above Felgo 4.0 Upgrade Guide for Qt 6.
Note: In addition to the changes listed in this document, you may face compile or runtime issues for custom Qt-related parts of your application. Contact us if you need help
for porting your application to Qt 6 and Felgo 4.
Future Updates and Roadmap for Felgo 4
Felgo 4.0 supports creating cross-platform apps for Windows, macOS, Linux, iOS and Android. Coming releases will include WebAssembly and embedded platforms like Raspberry Pi.
With Native App Integration for Felgo 4, it will be possible to embed Qt 6 views in your native iOS or Android apps.
New Felgo features will focus on improving Felgo 4. Important features and fixes will also be made available for Felgo 3 to maintain support for Qt 5 and existing projects.
If you need a Felgo feature that is not ported yet or if your project requires a custom solution for a problem, don’t hesitate to contact us.


