How to make 2048 with Felgo - Project Setup, Background and Controls
Creating a New Project
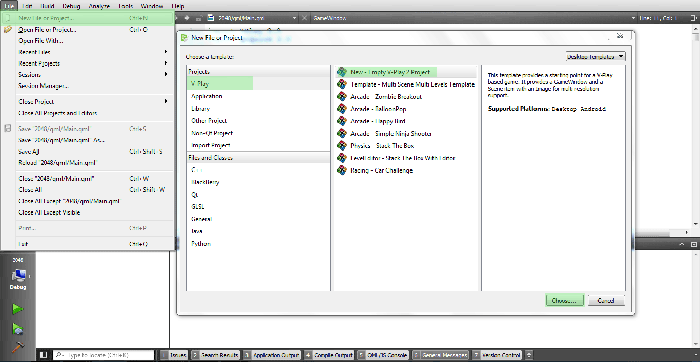
We start by setting up a new project. File/New File or Project /Felgo/New – Empty Felgo 3 Project and finally press Choose….
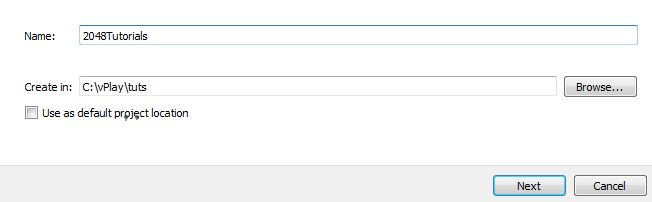
In the next window you choose a name and a location for your project.
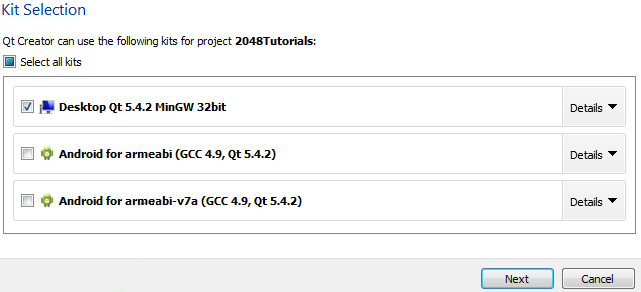
Next you choose your development kit. MinGW is typically used for windows. However, you need to pick a development kit depending on your platform. In case you don't have that, you can
update/download lacking components with the help of MaintenanceTool. You can find MaintenanceTool in the Felgo source folder, e.g. C:/Soft/Felgo
Now you are going to set the project properties. Keep the App display name as it is, but change App identifier to fit your project, for example – com.FelgoTutorials.2048Tutorials and set Interface orientation to
Portrait.
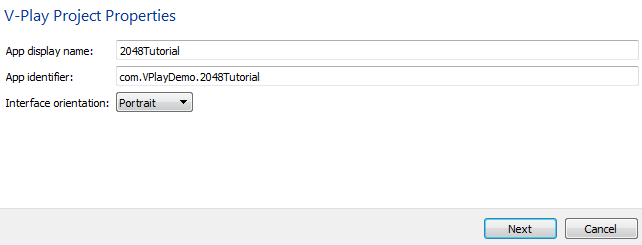
Press Next and Finish. Congratulations, you just created a project!
Main Background
Now we can get busy with creating our game scene and adding some colors. Open your project and go to QML/qml/Main.qml.

Remove everything and add the following code.
 import Felgo 4.0
 import QtQuick 2.2

 GameWindow {
   id: gameWindow

   screenWidth: 960
   screenHeight: 640

   activeScene: gameScene

   Scene {
     id: gameScene

     width: 480
     height: 320
   }
 }
GameWindow is our main component that holds all our scenes, entities and functions. Here you can put whatever width and height is
suitable for your monitor. To check different screen resolutions press ctrl+(1-9) while the program is running.
Scene is where you going to put your game. In this case however, width and height play a role of a logical game size and will be
auto-scaled to match the GameWindow size. You can read more about supporting different screen resolutions and aspect ratios here.
Let's define our background and fill it with some nice color plus an additional brown margin. Update your Scene so it looks like this.
import Felgo 4.0
import QtQuick 2.2
GameWindow {
Scene {
id: gameScene
width: 480
height: 320
Rectangle {
id: background
anchors.fill: gameScene.gameWindowAnchorItem
color: "#B6581A"
border.width: 5
border.color: "#4A230B"
radius: 10
}
}
}
Run your game to see the result (press the green triangle in the bottom left corner).
Most of the properties of this component are pretty obvious but anchors.fill requires some explanation. The QML anchoring system allows you to define relationships between the anchor lines of
different items. In this case we define all anchor lines of our background to match all anchor lines of the gameWindowAnchorItem. Basically, no matter how big the window size is, it is always covered
by our background rectangle. In this way we avoid black borders on some wide screen devices.
Tile Grid Background
Let's add some general properties of our game. Update your GameWindow component so it looks like this.
import Felgo 4.0
import QtQuick 2.2
GameWindow {
id: gameWindow
screenWidth: 960
screenHeight: 640
property int gridWidth: 300
property int gridSizeGame: 4
property int gridSizeGameSquared: gridSizeGame*gridSizeGame
property var emptyCells
property var tileItems: new Array(gridSizeGameSquared)
}
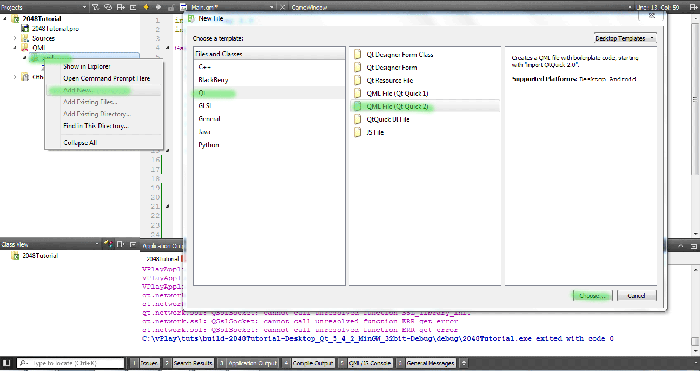
With the help of our freshly defined properties we are going to create a nice tiled background for our game. Create a new qml class by left-clicking qml/Add New…/Qt/QML File and press Choose…
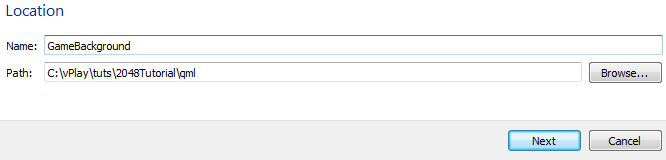
In the next window set the name to GameBackground.qml and proceed by clicking Next and Finish.
Add the following implementation for the game background.
import QtQuick 2.2
import Felgo 4.0
Rectangle {
id: gameBackground
width: gridWidth
height: width
color: "#4A230B"
radius: 5
Grid {
id: tileGrid
anchors.centerIn: parent
rows: gridSizeGame
Repeater {
id: cells
model: gridSizeGameSquared
Item {
width: gridWidth / gridSizeGame
height: width
Rectangle {
anchors.centerIn: parent
width: parent.width-2
height: width
color: "#E99C0A"
radius: 4
}
}
}
}
}
We start by setting up a background rectangle with an id gameBackground. This rectangle acts as our tile grid container. As you see, the width of the rectangle is set
to the gridWidth, one of the five properties we set in the Main.qml. By changing the value of gridWidth, you change the size of the whole tile
grid!
Inside the gameBackground we have a Grid component. The functionality of the component is pretty straightforward. You
create items inside the grid and their positions are adjusted according to the number of rows and/or columns you specified.
However, instead of creating items manually, we use a Repeater. The Repeater is a component that automatically creates a number of elements based on the model property. Just add an item/rectangle/button/… to the Repeater and you're done.
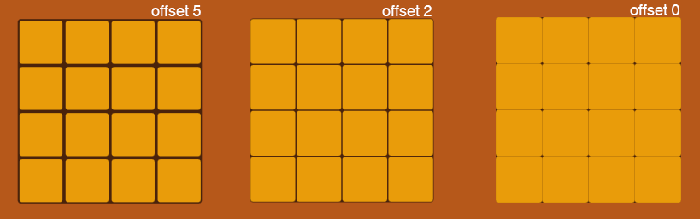
In our case, we first define an Item with a size deduced from (gridWidth/gridSizeGame) and then put a Rectangle inside. By doing this, we ensure that our Tile has a fancy edge offset while other distances and sizes are not disturbed.
You can set your own offset by changing the number next to the Rectangle's width and height. Different offset values are demonstrated on the picture below.
Just to clarify, these are not the tiles that we will move later in the game. This is just the background. You could use an image for this instead, but we are nerds, and we do it the nerd way! ;-)
In order to see the grid in our game, add the following Item component to the Main.qml. You should place the
Item within our Scene component, just after the background rectangle.
import Felgo 4.0
import QtQuick 2.2
GameWindow {
Scene {
Item {
id: gameContainer
width: gridWidth
height: width
anchors.centerIn: parent
GameBackground {}
}
}
}
Here we put our freshly created GameBackground.qml inside the Item gameContainer. This Item is not only a place to store our GameBackground, but will also be the target container for entities created by the EntityManager. The EntityManager is a component that creates, removes and keeps track of all entities created in the game. We can define a new EntityManager in our Main.qml like this.
import Felgo 4.0
import QtQuick 2.2
GameWindow {
EntityManager {
id: entityManager
entityContainer: gameContainer
}
}
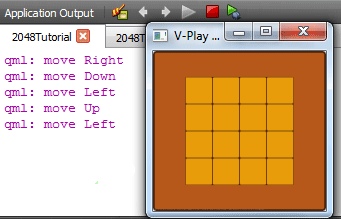
Go run your game and see what you got.
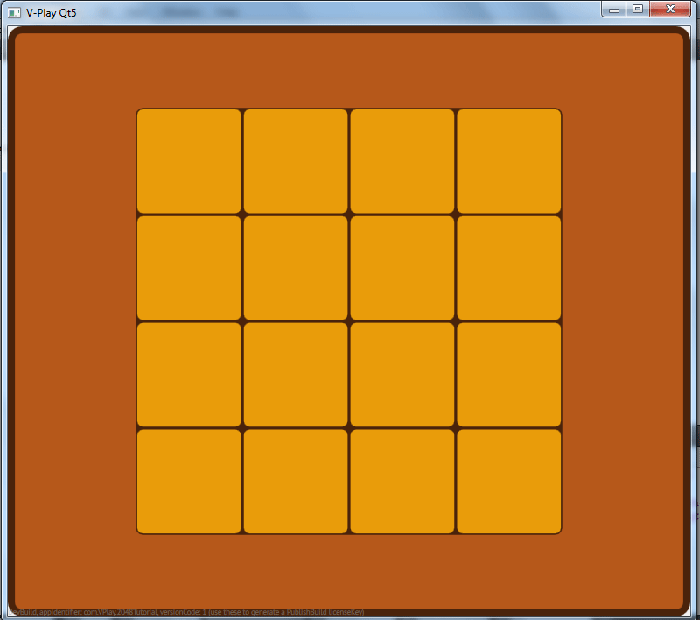
For now it's just a decorative orange grid, but very soon there will be tiles merging and sliding like crazy!
Keyboard Controls
Before we add our controls, we create a Timer that we trigger after each move/swipe. We will animate the tiles later and the animation will take
250ms, in order to prevent the animations from overlapping, we lock the input for 300ms to be sure that the animation has finished. The Timer goes
beneath our gameContainer.
import Felgo 4.0
import QtQuick 2.2
GameWindow {
Scene {
Timer {
id: moveRelease
interval: 300
}
}
}
We set the Timer id to moveRelease and set its interval to 300, meaning the Timer runs for 300ms and then stops. We will keep track of that and restart it every time a move/swipe was made.
After the Timer component, add this piece of code to track the keyboard input. We track the keyboard support to be quicker with testing on desktop,
as swipe movements are tedious with the mouse.
import Felgo 4.0
import QtQuick 2.2
GameWindow {
Scene {
Keys.forwardTo: keyboardController
Item {
id: keyboardController
Keys.onPressed: {
if (event.key === Qt.Key_Left && moveRelease.running === false) {
event.accepted = true
moveRelease.start()
console.log("move Left")
}
}
}
}
}
To keep a clear code structure, we create an empty Item to use as a container for the keyboard input. Keys.onPressed is
the general signal we receive in case some Key was pressed. If Qt.Key_Left is pressed and the Timer is not running, we
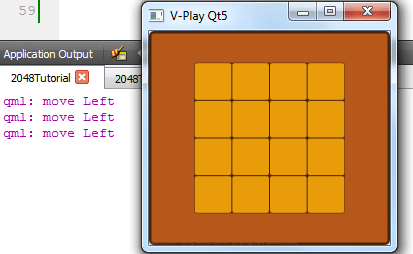
accept the event, restart the Timer and write the event to the console for testing purposes.
If you run the app and press the left key several times, you will notice that we can only move Left every 300ms. Since we don't have any tiles yet, we use the console to check our output.
Just below the Qt.Key_Left statement, try to write a similar if statement for each of the arrow keys - Qt.Key_Right, Qt.Key_Up, Qt.Key_Down.
Swipe Controls
With the help of a MouseArea component we keep track of touch/swipe events of a mobile device and clicks/drags of a mouse. To implement this
component paste this code just after your keyboard Item.
import Felgo 4.0
import QtQuick 2.2
GameWindow {
Scene {
MouseArea {
id:mouseArea
anchors.fill: gameScene.gameWindowAnchorItem
property int startX
property int startY
property string direction
property bool moving: false
onPressed: {
startX = mouse.x
startY = mouse.y
moving = false
}
onReleased: {
moving = false
}
onPositionChanged: mouse => {
var deltax = mouse.x - startX
var deltay = mouse.y - startY
if (moving === false) {
if (Math.abs(deltax) > 40 || Math.abs(deltay) > 40) {
moving = true
if (deltax > 30 && Math.abs(deltay) < 30 && moveRelease.running === false) {
console.log("move Right")
moveRelease.start()
}
else if (deltax < -30 && Math.abs(deltay) < 30 && moveRelease.running === false) {
console.log("move Left")
moveRelease.start()
}
else if (Math.abs(deltax) < 30 && deltay > 30 && moveRelease.running === false) {
console.log("move Down")
moveRelease.start()
}
else if (Math.abs(deltax) < 30 && deltay < 30 && moveRelease.running === false) {
console.log("move Up")
moveRelease.start()
}
}
}
}
}
}
}
We start by giving an id and defining an anchor to our MouseArea component. As you can
see by calling anchors.fill you can fill any area you want to work as a clickable input receiver. In this case our area has the exact same anchor reference as our big brown background –
gameScene.gameWindowsAnchorsItem. This means the MouseArea covers the entire screen and reacts to all possible
screen touches.
To know in what direction the user is swiping we check the difference (new.position-old.position) for both coordinates and based on that we call a move function to all our tiles (but for now we just write to the console). We
also check and restart our moveRelease Timer. If you run your game and swipe the screen, you can see that the direction of
the swipe gets printed in the console.