How to make 2048 with Felgo - Colors and Animations

For a complete picture just a few small details are missing. I’m talking about animations and colors. In order to add those we are going to work with our old buddy Tile.qml.
Tile.qml
 import QtQuick 2.2
 import Felgo 4.0

 EntityBase{
   id: tile
   entityType: "Tile"

   width: gridWidth / gridSizeGame
   height: width // square so height=width

   property int tileIndex // is responsible for a position of the tile
   property int tileValue // tileValue is what gets incremented every time 2 tiles get merged
   property color tileColor
   property color tileTextColor: "white"
   property string tileText

   // tileFontSize is deduced from the tile width, therefore it will always fit into the tile(up to 10^5)
   property int tileFontSize: width/3

   // animationDuration is responsible for how long an animation will go
   // 500ms for desktop and 250ms for mobiles
   property int animationDuration: system.desktopPlatform ? 500 : 250

   // tileColor corresponds to the tileValue
   property var bgColors: ["#000000", "#88B605", "#587603", "#293601", "#48765F", "#1A9C70", "#14C3B6", "#1591B6", "#1668C3", "#1C15B6", "#821DB6", "#C31555"]

   // tile rectangle
   Rectangle {
     id: innerRect
     anchors.centerIn: parent // center this object in the invisible "EntityBase"
     width: parent.width-2 // -2 is the width offset, set it to 0 is no offset is needed
     height: width // square so height=width
     radius: 4 // radius of tile corners
     color: bgColors[tileValue]

     // tile text
     Text {
       id: innerRectText
       anchors.centerIn: parent // center this object in the "innerRect"
       color: tileTextColor
       font.pixelSize: tileFontSize
       text: Math.pow(2, tileValue) // tileValue gets squared according to the 2048 rules (1,2,3) ->(2,4,6)
     }
   }

   // startup position calculation
   Component.onCompleted: {
     x = (width) * (tileIndex % gridSizeGame) // we get the current row and multiply with the width to get the current position
     y = (height) * Math.floor(tileIndex/gridSizeGame) // we get the current column and multiply with the width to get the current position
     tileValue = Math.random() < 0.9 ? 1 : 2 // a new tile has 10% = 4 and 90% = 2
     showTileAnim.start() // new tile animation trigger
   }

   // this methods gets called every time a tile moves
   // it has exactly the same kind of behavior as our previous method
   // however, the values get transfered to a targetPoint to simplify our movement animations
   function moveTile(newTileIndex) {
     tileIndex = newTileIndex
     moveTileAnim.targetPoint.x = ((width) * (tileIndex % gridSizeGame))
     moveTileAnim.targetPoint.y = ((height) * Math.floor(tileIndex/gridSizeGame))
     moveTileAnim.start()
   }

   function destroyTile() { // trigger tile death animation
     deathAnimation.start()
   }

   // in a parallel animation, animations which are inside will run at the same time
   ParallelAnimation {
     id: showTileAnim

     // number animation works with any real number
     NumberAnimation {
       target: innerRect // specify the target of the animation
       property: "opacity" // specify the property that will be animated
       from: 0.0
       to: 1.0
       duration: animationDuration
     }

     // ScaleAnimator used for scaling
     ScaleAnimator {
       target: innerRect
       from: 0
       to: 1
       duration: animationDuration
       easing.type: Easing.OutQuad // Easing used to put some live action in your animation
     }
   }

   // movement animation
   ParallelAnimation {
     id: moveTileAnim
     property point targetPoint: Qt.point(0,0)
     NumberAnimation {
       target: tile
       property: "x"
       duration: animationDuration/2
       to: moveTileAnim.targetPoint.x
     }
     NumberAnimation {
       target: tile
       property: "y"
       duration: animationDuration/2
       to: moveTileAnim.targetPoint.y
     }
   }

   // a ScriptAction is treated like an animation, so the SequentialAnimation will call this script after the previous animation has finished
   // in other words, when the tile is completely faded out, it will be removed
   SequentialAnimation {
     id: deathAnimation
     NumberAnimation {
       target: innerRect
       property: "opacity"
       from: 1
       to: 0
       duration: animationDuration/2
     }
     ScriptAction {
       script: removeEntity() // removesEntity from the game
     }
   }
 }
It definitely looks longer now, but the truth is only a few things got changed.
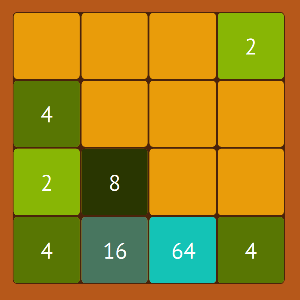
We added colors, so when a tile gets incremented it changes its color.
In addition our moveTile() function has been edited a bit. Instead of setting its position by itself, it sends the next position coordinates to the animation method.
Speaking of animation, at the moment we have several NumberAnimation elements and one ScaleAnimator. They all behave in a very similar pattern. You specify an id of a target you want to affect, a property you want to affect,
from-to values, and how long the animation should take to complete.
ParallelAnimation plays all its children animation at the same time. While SequentialAnimation plays its children one after another.
As you can see, we make the entity removal a part of the death animation. We put it in a ScriptAction of the SequentialAnimation so it gets played after opacity reaches 0.
Just for information, you can also nest ParallelAnimation and SequentialAnimation , e.g. run a number of SequentialAnimation parallel.
Go run your game and enjoy!

You can also try different grid sizes. Just change gridSize number in the Main.qml

Congratulations, you just completed this 2048 game tutorial!
As in any development process there is still plenty of space for modifications and improvement. For example the game still lacking gameover condition and there is no highscore counter. You can try to make it on your own with the help of existing Felgo Tutorials, components and plugins, or you could take a break and wait for the second part of this tutorial.