How to make a game like Pong with Felgo - GameWindow, Scenes and Physical Worlds
When finished the last step, the main.qml file is opened and you can run the application. If you do not see the Hello World screen or any other errors occur you should go through the last steps until the example works before you continue. You can remove the Scene and all its child objects. Only the GameWindow should remain. In debug mode on desktops, you can see a FPS display in the left bottom corner of the window which shows you the frame rate. It won't be displayed in release mode when building with the build server. If still needed for testing, you can enable it also in release mode with
displayFpsEnabled: true
Afterwards your main.qml should contain following code:
 import Felgo 4.0
 import QtQuick 2.0

 GameWindow {
   id: window
   // depending on which window size is defined as start resolution here, the corresponding image sizes get loaded here! so for testing hd2 images, at least use factor 3.5
   // the window size can be changed at runtime by pressing the keys ctrl(cmd)+1-7. Fullscreen can be changed by pressing the keyboard button ctrl(cmd)+F. (see GameWindow.qml)
   screenWidth: 480*2//*1.5 // for testing on desktop with the highest res, use *1.5 so the -hd2 textures are used
   screenHeight: 320*2//*1.5

   // enable FPS in release mode
   displayFpsEnabled: true
 }
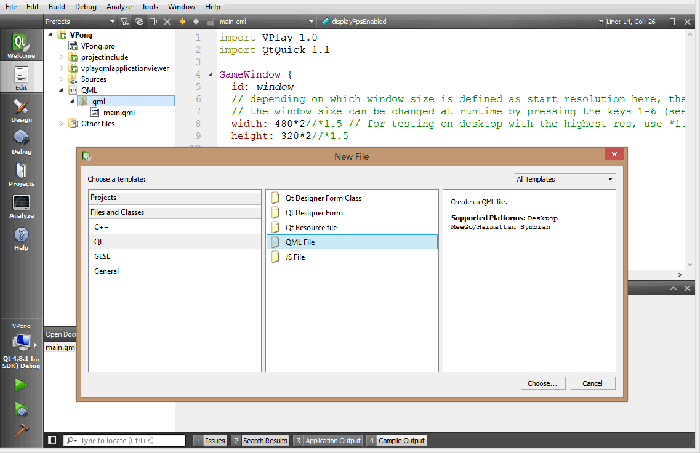
Presenting game content is similar to theater. The view and everything which can be seen is presented in the Scene. You can change the Scene and everything you see in your view will change automatically. In Felgo everything can be split into different scenes. Each window can have several scenes. Only one active at the time. You could have one Scene for the intro, the main menu, for each submenu, the credit screen or the actual game. Therefore, you can add a new Scene using the context menu in your qml directory for creating a new qml file called VPongScene.

Remove the Rectangle created in the VPongScene.qml and replace it with the Scene item seen below. The Scene has a logical width and height which should be independent of the actual size of the display which is store in the GameWindow. This is important if you want to create a game for different devices using different display sizes. Very common size would be a size of 480x320. For an explanation on how you can support multiple screens and resolutions see How to create mobile games for different screen sizes and resolutions
 import QtQuick 2.0
 import Felgo 4.0

 Scene {
   id: scene
   // this is important, as it serves as the reference size for the mass of the phyics objects, because the mass of a body depends on the width of its images
   // use 480x320 (for landscape games) or 320x480 (for portrait games), as it then works on smaller devices as well
   // if you only want to target tablets, this size might be increased to e.g. 1024x768 when targeting iPad-only
   // when the screen size is bigger than the logical scene size defined here (e.g. 800x480), the content will be scaled automatically with the default scalemode "letterbox"
   // the scene can be placed in the bigger window with the properties sceneAlignmentX & sceneAlignmentY (both default to center)
   // so to use the remaining screen size and not show black borders around the edges, use a bigger background image
   // the recommended maximum background size is 570x360 for sd-images, and 1140x720 for hd-images and 2280x1440 for hd2-images
   // these factors are calculated by starting with a 3:2 aspect ratio (480x320) and considering the worst aspect ratios 16:9 and 4:3
   width: 480
   height: 320

 }
Now you have created a Scene template which needs to be placed in the GameWindow. Open main.qml and add a new Scene Item to the GameWindow.
 ...
   displayFpsEnabled: true

   // The game scene which includes everything presented on screen
   VPongScene {
     id: scene
   }

 ...
In this game you will use the Felgo PhysicsWorld to simulate the game world. Therefore, the whole game world, placed in this Scene is driven by physics. This means a PhysicsWorld item needs to be added in the Scene.qml which allows collision detection and more.
 ...
   width: 480
   height: 320

   // allows collision detection with physics colliders (BoxColliders, CircleColliders and PolygonColliders)
   // it supports 2 modes:
   //  - for collision testing (set collisionTestingOnlyMode to true) when the positions get updated manually, e.g. by animations
   //  - for physics driven games like AngryBirds or this sample game
   PhysicsWorld {
     id: physicsWorld
     // this puts it on top of all other items for the physics debug renderer
     z: 1

     // for physics-based games, this should be set to 60!
     updatesPerSecondForPhysics: 60

     // this should be increased so it looks good, by default it is set to 1 to save performance
     // when it is left at 1, the ball sometimes "float" into the wall or paddles
     velocityIterations: 5
     positionIterations: 5
   }
 ...